Salesforce Files Connect
Implementation Guide
Salesforce, Winter ’25
Last updated: July 25, 2024
©
Copyright 2000–2024 Salesforce, Inc. All rights reserved. Salesforce is a registered trademark of Salesforce, Inc., as are other
names and marks. Other marks appearing herein may be trademarks of their respective owners.

CONTENTS
FILES CONNECT FOR ADMINISTRATORS . . . . . . . . . . . . . . . . . . . . . . . . . . . . . . 1
The Files Connect Setup Process . . . . . . . . . . . . . . . . . . . . . . . . . . . . . . . . . . . . . . . . . . . . 1
Enable Salesforce Files Connect for Your Organization . . . . . . . . . . . . . . . . . . . . . . . . . . . . . 2
Let Users and Administrators Access Files Connect Data Sources . . . . . . . . . . . . . . . . . . . . . . 2
Create an Authentication Provider for Box . . . . . . . . . . . . . . . . . . . . . . . . . . . . . . . . . . . . . 3
Define an External Data Source for Box . . . . . . . . . . . . . . . . . . . . . . . . . . . . . . . . . . . . . . . 4
Create an Authentication Provider for Google Drive . . . . . . . . . . . . . . . . . . . . . . . . . . . . . . . 5
Define an External Data Source for Google Drive . . . . . . . . . . . . . . . . . . . . . . . . . . . . . . . . . 6
Create an Authentication Provider for SharePoint Online Using Azure (Preferred Method) . . . . . . 7
Create an Authentication Provider Using Placeholder Values . . . . . . . . . . . . . . . . . . . . . 7
Register a Web Application in the Azure Management Console . . . . . . . . . . . . . . . . . . . 8
Configure the Authentication Provider in Salesforce . . . . . . . . . . . . . . . . . . . . . . . . . . . 8
Create an Authentication Provider for SharePoint Online or OneDrive for Business Using Office
365 (Alternate Method) . . . . . . . . . . . . . . . . . . . . . . . . . . . . . . . . . . . . . . . . . . . . . . . . . . 9
Create an Authentication Provider Using Placeholder Values . . . . . . . . . . . . . . . . . . . . . 9
Register an Office 365 App . . . . . . . . . . . . . . . . . . . . . . . . . . . . . . . . . . . . . . . . . . . . 9
Edit the Authentication Provider in Salesforce . . . . . . . . . . . . . . . . . . . . . . . . . . . . . . . 11
Define an External Data Source for SharePoint Online or OneDrive for Business . . . . . . . . . . . . 11
Include a Files Connect Data Source in Global Search . . . . . . . . . . . . . . . . . . . . . . . . . . . . . 13
Include SharePoint Custom Properties in Search, SOQL, and SOSL Queries . . . . . . . . . . . . . . . 16
FILES CONNECT FOR USERS . . . . . . . . . . . . . . . . . . . . . . . . . . . . . . . . . . . . . . . . 18
Set Up Authentication to an External Data Source . . . . . . . . . . . . . . . . . . . . . . . . . . . . . . . . 18
Manage Your Files Connect External Data Source Authentication Credentials . . . . . . . . . . . . . 19
Access and Share Files Connect External Files . . . . . . . . . . . . . . . . . . . . . . . . . . . . . . . . . . 20
Search for Files Connect External Files . . . . . . . . . . . . . . . . . . . . . . . . . . . . . . . . . . . . . . . 22
FILES CONNECT FOR ADMINISTRATORS
The Files Connect Setup Process
EDITIONS
Available in: both Salesforce
Classic (not available in all
orgs) and Lightning
Experience
Files Connect for
cloud-based external data
sources is available in:
Professional, Enterprise,
Performance, Unlimited,
and Developer Editions
The setup process for Files Connect varies by external data source.
Tip: For detailed visuals, tips, and troubleshooting, see the Files Connect Setup Guide and
User Guide.
First, enable Files Connect, and let users access related
external data sources
•
Enable Salesforce Files Connect for Your Organization.
•
Let Users and Administrators Access Files Connect Data Sources.
For cloud-based data sources, create an authentication
provider, and then define the source
If you use Google Drive:
•
Create an Authentication Provider for Google Drive.
•
Define an External Data Source for Google Drive.
If you use Quip:
•
Set Up Salesforce Anywhere Advanced.
If you use Microsoft’s cloud systems:
•
Create an Authentication Provider for SharePoint Online Using Azure (Preferred Method).
•
Define an External Data Source for SharePoint Online or OneDrive for Business.
If you use Box:
•
Create an Authentication Provider for Box.
•
Define an External Data Source for Box.
Include the external data in global search
To let users access external data in global Salesforce searches, you’ll need to create an external object and give users access to its fields.
This is an optional step, but highly recommended to best integrate external data with Salesforce.
For per-user data sources, have users authenticate in Salesforce
If you specified per-user authentication for a data source and exposed it through profiles or permission sets, ask authorized users to
provide their data source credentials.
1
Start accessing, sharing, and searching external files!
Now users can access and share external files via the Files tab and feed, and search for them right alongside their Salesforce content.
Enable Salesforce Files Connect for Your Organization
EDITIONS
Available in: both Salesforce
Classic (not available in all
orgs) and Lightning
Experience
Files Connect for
cloud-based external data
sources is available in:
Professional, Enterprise,
Performance, Unlimited,
and Developer Editions
USER PERMISSIONS
To enable Salesforce Files
Connect:
• Customize Application
Let users search and share files from external systems like Google Drive and SharePoint.
1. From Setup, enter Files Connect in the Quick Find box, and then select Files
Connect.
2. Click Edit, and then select Enable Files Connect.
3. For File Sharing, select one of the following:
•
Copy — stores a copy of external files in Salesforce. If files are shared with a Chatter group,
all group members can access the files, even if they lack access to the external system.
•
Reference — points to external files stored outside Salesforce. No file previews are available,
and file downloads require user access to the external system. (Users must enter credentials
for the system in the Authentication Settings for External Systems section of personal setup).
Choose Copy mode if your organization shares files with external customers or partners. Choose
Reference mode to reflect access restrictions from the external system in Salesforce.
Regardless of sharing mode, files in Salesforce don’t reflect file revisions in external systems. However,
Reference mode points to the latest versions in those systems.
Let Users and Administrators Access Files Connect Data Sources
EDITIONS
Available in: both Salesforce
Classic (not available in all
orgs) and Lightning
Experience
Files Connect for
cloud-based external data
sources is available in:
Professional, Enterprise,
Performance, Unlimited,
and Developer Editions
USER PERMISSIONS
To set permissions:
• Customize Application
After you enable Files Connect, give users and administrators permission to access specific external
data sources from Salesforce.
Tip: You can provide access to data sources through permission sets or custom profiles.
However, permission sets let you more quickly adjust access for several types of users.
Regardless of which method you choose, be sure to give administrators access so they can
configure data sources.
1. From Setup, enter Permission Sets in the Quick Find box, then select Permission
Sets or enter Profiles in the Quick Find box, then select Profiles.
2. Create a permission set or profile, or click an existing one.
If you use a permission set, User License must be set to the default option, “None.”
3. For a permission set, click System Permissions, then click Edit.
For a profile, click Edit, and scroll down to the Administrative Permissions section.
4. To access cloud-based data sources, select Files Connect Cloud, and then click Save.
5. For a permission set, click Manage Assignments in the toolbar at the top of the page. Then
click Add Assignments, select users for the permission set, and click Assign.
2
Enable Salesforce Files Connect for Your OrganizationFiles Connect for Administrators
Important: Include any administrators who need to configure external data sources.
6. If you haven’t already, define the external data sources for your organization:
•
Define an External Data Source for SharePoint Online or OneDrive for Business
•
Define an External Data Source for Google Drive
•
Define an External Data Source for Box
If you select an identity type of Named Principal for the data source, skip the following steps. But if you select Per User, read on.
7. In Setup, return to the detail page for the permission set or profile. Then do either of the following:
•
For a permission set, in the Apps section, click External Data Source Access.
•
For a profile, go to the Enabled External Data Source Access related list.
8. Click Edit, add specific data sources to the Enabled External Data Sources list, and click Save.
(Users enter their credentials when they first access external data sources, or from their personal settings on the Authenticated
Settings for External Systems page.)
Create an Authentication Provider for Box
EDITIONS
Available in: Salesforce
Classic (not available in all
orgs)
Available in: Professional,
Enterprise, Performance,
Unlimited, and Developer
Editions
USER PERMISSIONS
To create authentication
providers:
• Customize Application
AND
Manage Auth. Providers
To use Box as an external data source, first create an authentication provider for it in Salesforce.
For detailed visuals, tips, and troubleshooting, see the Files Connect Setup Guide and User Guide.
1. In Setup, enter Auth. Providers in the Quick Find box, then select Auth. Providers.
2. Click New.
3. For Provider Type, select OpenID Connect, and then set the following options:
•
Name — Enter the name you want to appear in Salesforce.
•
URL Suffix — Enter a suffix you want to appear at the end of the URL path. By default,
the suffix reflects the Name entry.
•
Consumer Key — Enter any placeholder value. You fill this in after you create the Box
application in Step 5.
•
Consumer Secret — Enter any placeholder value. You fill this in after you create the
Box application in Step 5.
•
Authorize Endpoint URL — Enter
https://account.box.com/api/oauth2/authorize
•
Token Endpoint URL — Enter https://api.box.com/oauth2/token
•
User Info Endpoint URL — Leave empty.
•
Default Scopes — Leave empty.
4. Click Save. Then, at the bottom of the Auth. Provider detail page, copy the Callback URL entry to a text file. (Use this when
creating the Box application.)
5. After you create the Box application, edit the Salesforce Auth. Provider and replace the following values with those from the Box
app.
•
Consumer.Key: the Box client_id.
•
Consumer.Secret: the Box client_secret.
3
Create an Authentication Provider for BoxFiles Connect for Administrators
6. Click Save.
Your Box authentication provider is now ready to use. Next, you can create a Box application.
7. Using the credentials of your Box admin account, log in to https://app.box.com/developers/services.
8. Click Create a Box Application.
9. Enter a project name, select Box content, and click Create Application.
10. Click Configure your application.
11. In the redirect_uri field, paste the Salesforce callback URL specified in the OAuth2 specification.
12. Copy the client_id and client_secret values to a text file. Enter these values at step 6 of Create an Authentication Provider in
Salesforce.
Define an External Data Source for Box
EDITIONS
Available in: both Salesforce
Classic (not available in all
orgs) and Lightning
Experience
Available in: Professional,
Enterprise, Performance,
Unlimited, and Developer
Editions
USER PERMISSIONS
To define an external data
source:
• Customize Application
Let users access their Box content from Files home, feed posts, and search.
1. From Setup in Salesforce Classic, enter External Data Sources in the Quick Find
box, then select External Data Sources.
2. Click New External Data Source. Then set the following options.
DescriptionField
A user-friendly name for the data source
displayed in the Salesforce user interface.
Label
A unique identifier used to refer to this
external data source definition through the
API. The Name field can contain only
underscores and alphanumeric characters. It
must be unique, begin with a letter, not
include spaces, not end with an underscore,
and not contain two consecutive underscores.
Name
Choose Files Connect: BoxType
The identity type used to authenticate to the
external data source.
Select Per User to require separate credentials
for each user who accesses the data source.
Identity Type
(Administrators must enable the data source
for specific permission sets and profiles. Users
then enter their credentials when first
accessing the data source.)
The protocol used to access Box.
Select OAuth 2.0.
Authentication Protocol
Enter the Box Authentication Provider.Authentication Provider
4
Define an External Data Source for BoxFiles Connect for Administrators
DescriptionField
Leave blank.Scope
Select to immediately test the settings above.Start Authentication Flow on Save
Files from a Box data source can’t be previewed in the file preview player.
Create an Authentication Provider for Google Drive
EDITIONS
Available in: Salesforce
Classic (not available in all
orgs)
Available in: Professional,
Enterprise, Performance,
Unlimited, and Developer
Editions
USER PERMISSIONS
To create authentication
providers:
• Customize Application
AND
Manage Auth. Providers
To use Google Drive as an external data source, create an authentication provider for it in Salesforce.
The process begins with creating a related project in the Google Developers console.
For detailed visuals, tips, and troubleshooting, see the Files Connect Setup Guide and User Guide.
1. Using the credentials of your Google App for Work admin account, log in to
https://console.cloud.google.com.
2. In the title bar, expand Select Project and click Create Project.
3. Enter a project name and location, and click Create.
4. In the project dashboard, click the menu icon in the upper left, and then click APIs & Services.
5. In the API manager, go to the Library tab and search for Google Drive API.
6. In the search results, click Google Drive API, and then click Enable API.
7. In the menu on the left, click Credentials.
8. In the OAuth Consent Screen tab, enter a valid email address and application name, and click
Save.
9. In the Credentials tab, click Add credentials, and select OAuth client ID.
10. Select Web application, and click Create.
11. Copy the client ID and client secret values to a text file.
Use these values next, when you create an authentication provider in Salesforce.
12. In Setup, enter Auth. Providers in the Quick Find box, then select Auth. Providers.
13. Click New.
14. For Provider Type, select OpenID Connect, and then set the following options:
•
Name — Enter the name you want to appear in Salesforce.
•
URL Suffix — Enter the suffix at the end of the URL path. For example, in the path,
https://login.salesforce.com/services/authcallback/00Dx00000000001/MyGoogleProvider,
the suffix is “MyGoogleProvider”
•
Consumer Key — Enter the client ID you copied when creating the Google project.
•
Consumer Secret — Enter the client secret you copied when creating the Google project.
•
Authorize Endpoint URL —Enter
https://accounts.google.com/o/oauth2/auth?access_type=offline&approval_prompt=force
•
Token Endpoint URL — Enter https://accounts.google.com/o/oauth2/token
•
Default Scopes — Enter openid email profile https://www.googleapis.com/auth/drive
5
Create an Authentication Provider for Google DriveFiles Connect for Administrators
15. Click Save.
16. At the bottom of the Auth. Provider detail page, copy the Callback URL entry to a text file. Use this URL when you edit the
Google project next.
17. In the API Manager, in the menu on the left, click Credentials.
18. Click the previously created web app.
19. In the Authorized Redirect URIs section, add the Callback URL you copied when creating the authentication provider in Salesforce,
and click Save.
Define an External Data Source for Google Drive
EDITIONS
Available in: both Salesforce
Classic (not available in all
orgs) and Lightning
Experience
Available in: Professional,
Enterprise, Performance,
Unlimited, and Developer
Editions
USER PERMISSIONS
To define an external data
source:
• Customize Application
Let Chatter users access their Google Drive content from the Files tab, feed posts, and search.
Salesforce supports Google documents, spreadsheets, presentations, and drawings.
1. From Setup, enter External Data Sources in the Quick Find box, then select
External Data Sources.
2. Click New External Data Source. Then set the following options.
DescriptionField
A user-friendly name for the data source
displayed in the Salesforce user interface.
Label
A unique identifier used to refer to this
external data source definition through the
API. The Name field can contain only
underscores and alphanumeric characters. It
must be unique, begin with a letter, not
include spaces, not end with an underscore,
and not contain two consecutive underscores.
Name
Choose Files Connect: Google DriveType
The identity type used to authenticate to the
external data source.
Select Per User to require separate credentials
for each user who accesses the data source.
Identity Type
(Administrators must enable the data source
for specific permission sets and profiles. Users
then enter their credentials when first
accessing the data source..)
Select Named Principal to use the same set
of credentials for every user who accesses the
data source from Salesforce.
The protocol used to access Google Drive.
Select OAuth 2.0.
Authentication Protocol
6
Define an External Data Source for Google DriveFiles Connect for Administrators
DescriptionField
Enter the Google Drive authentication provider.Authentication Provider
Leave blank.Scope
Select to immediately test the settings above.Start Authentication Flow on Save
Create an Authentication Provider for SharePoint Online Using Azure
(Preferred Method)
EDITIONS
Available in: both Salesforce
Classic (not available in all
orgs) and Lightning
Experience
Available in: Professional,
Enterprise, Performance,
Unlimited, and Developer
Editions
USER PERMISSIONS
To create authentication
providers:
• Customize Application
AND
Manage Auth. Providers
To use a Microsoft cloud-based external data source, create an authentication provider for it in
Salesforce and register that provider in a Microsoft Azure web application.
Tip: For detailed visuals, tips, and troubleshooting, see the Files Connect Setup Guide and
User Guide.
The high-level steps to fully configure an authentication provider include
•
Creating an Authentication Provider Using Placeholder Values.
•
Registering a Web Application in the Azure Management Console. If you don’t have access to
the Azure Management Console, or to authenticate to OneDrive for Business, follow these
instructions to register your app in Office 365: Create an Authentication Provider for SharePoint
Online or OneDrive for Business Using Office 365 (Alternate Method).
•
Configuring the Authentication Provider in Salesforce
Create an Authentication Provider Using Placeholder
Values
The authentication provider has a redirect URI so you can register your app.
1. In Setup, enter Auth. Providers in the Quick Find box, then select Auth. Providers.
2. Click New.
3. For Provider Type, select OpenID Connect, and then set the following options.
•
Name — Enter the name you want to appear in Salesforce.
•
URL Suffix — Enter a suffix you want to appear at the end of the URL path. By default, the suffix reflects the Name entry.
•
Consumer Key — Enter a placeholder value.
•
Consumer Secret — Enter a placeholder value.
•
Authorize Endpoint URL — Enter a placeholder that begins with https.
•
Token Endpoint URL — Enter a placeholder that begins with https.
•
Default Scopes — Leave empty.
4. Click Save. Then, at the bottom of the Auth. Provider detail page, copy the Callback URL entry to a text file.
7
Create an Authentication Provider for SharePoint Online Using
Azure (Preferred Method)
Files Connect for Administrators
Register a Web Application in the Azure Management Console
1. Log in to Azure at https://portal.azure.com/. (If you have any trouble, connect to Azure with your browser in “incognito”
mode.)
2. Under Azure Services, select Azure Active Directory.
3. Select your active directory. Skip this step if you only have one.
4. On the Active Directory page, select App registrations from the left navigation menu.
5. In the header menu, click New Registration.
6. Under Create, enter the following properties:
•
Name — Enter a name for your application.
•
Supported Account Types — Enter accounts that are only in this organizational directory.
7. Click Register.
8. After the app is created, from the left panel, click Overview.
9. Copy the Application ID to a text file. You need this ID to configure the auth. provider in Salesforce.
10. From the left panel, click Certificates & Secrets.
11. Click New Client Secret, enter a description, select a duration, and click Add. To see the key value, click Save.
12. Copy the key so you can use it in the auth. provider.
13. From the left panel, click Authentication. Under Redirect URIs, select type as Web and paste the callback URL that you copied
from the bottom of the Auth. Provider detail page.
14. From the left panel, click API Permissions, click Add a permission, and click Sharepoint.
15. Choose which required app permissions you want to enable and click Add permission.
Configure the Authentication Provider in Salesforce
In Salesforce, replace the original placeholder values with the correct ones from the Azure app.
1. In Setup, enter Auth. Providers in the Quick Find box, then select Auth. Providers.
2. Next to the authentication provider you created earlier, click Edit.
3. Change the following values.
•
Consumer Key — Enter the Client ID you copied to a text file.
•
Consumer Secret — Enter the key you copied to a text file.
•
Authorize Endpoint URL — Enter:
https://login.microsoftonline.com/common/oauth2/authorize?resource=https%3A%2F%2FYOUR_TENANT.sharepoint.com&prompt=login
•
Token Endpoint URL — Enter: https://login.microsoftonline.com/common/oauth2/token
•
SharePoint Online example:
https://login.microsoftonline.com/common/oauth2/authorize?prompt=consent&
resource=https%3A%2F%2Fcontenthubblitz.sharepoint.com%2F
4. Click Save.
8
Register a Web Application in the Azure Management
Console
Files Connect for Administrators
Create an Authentication Provider for SharePoint Online or OneDrive
for Business Using Office 365 (Alternate Method)
EDITIONS
Available in: Salesforce
Classic (not available in all
orgs)
Available in: Professional,
Enterprise, Performance,
Unlimited, and Developer
Editions
USER PERMISSIONS
To create authentication
providers:
• Customize Application
AND
Manage Auth. Providers
To use one of Microsoft’s cloud-based external data sources, first create an authentication provider
for it in Salesforce and register that provider in an Office 365 app.
Tip: For detailed visuals, tips, and troubleshooting, see the Files Connect Setup Guide and
User Guide.
To fully configure an authentication provider, you have to
•
Create an Authentication Provider Using Placeholder Values
•
Register and Office 365 App
•
Edit the Authentication Provider in Salesforce
Create an Authentication Provider Using Placeholder
Values
1. In Setup, enter Auth. Providers in the Quick Find box, then select Auth. Providers.
2. Click New.
3. For Provider Type, select Microsoft Access Control Service, and then set the following
options.
•
Name — Enter the name you want to appear in Salesforce.
•
URL Suffix — Enter a suffix you want to appear at the end of the URL path. By default, the suffix reflects the Name entry.
•
Consumer Key — Enter a placeholder value.
•
Consumer Secret — Enter a placeholder value.
•
Authorize Endpoint URL — Enter a placeholder that begins with https.
•
Token Endpoint URL — Enter a placeholder that begins with https.
•
Default Scopes — Leave empty.
4. Click Save. Then, at the bottom of the Auth. Provider detail page, copy the Callback URL entry to a text file. (Use this when
registering an Office 365 app.)
Register an Office 365 App
1. Log in to your Office365 account as an administrator, and go to one of the following URLs.
•
SharePoint Online: https://your company name.sharepoint.com/site collection
path/_layouts/15/appregnew.aspx
•
OneDrive for Business: https://your company
name-my.sharepoint.com/_layouts/15/appregnew.aspx
2. Set the following options.
•
Client Id — Click Generate, and copy the generated value to a text file.
•
Client Secret — Click Generate, and copy the generated value to a text file.
9
Create an Authentication Provider for SharePoint Online or
OneDrive for Business Using Office 365 (Alternate Method)
Files Connect for Administrators

•
Title — Enter a name for the app.
•
App Domain — Enter the domain name of your Salesforce org.
•
Redirect URL — Enter the Callback URL you copied when creating the Authentication Provider in Salesforce.
3. Click Create.
Now you configure the newly created app to access SharePoint resources.
4. Go to one of the following URLs.
•
SharePoint Online: https://your company name.sharepoint.com/site collection
path/_layouts/15/appinv.aspx
•
OneDrive for Business: https://your company name-my.sharepoint.com/_layouts/15/appinv.aspx
5. Set the following options.
•
App Id — Enter the Client Id you copied to a text file, then click Lookup.
•
Title — Keep the default value.
•
App Domain — Keep the default value.
•
Redirect URL — Keep the default value.
•
Permission Request XML — Enter a string with this format.
–
SharePoint Online:
<AppPermissionRequests>
<AppPermissionRequest Scope="[SCOPE]" Right="[PLACEHOLDER]"/>
</AppPermissionRequests>
–
OneDrive for Business:
<AppPermissionRequests>
<AppPermissionRequest Scope="http://sharepoint/content/tenant"
Right="[PLACEHOLDER]"/>
<AppPermissionRequest Scope="http://sharepoint/social/tenant" Right="Read"/>
</AppPermissionRequests>
6. For SharePoint Online, replace [SCOPE] with one of these values. Office 365 recognizes only these scope URLs; copy them exactly,
without changes.
•
http://sharepoint/content/sitecollection/web so users can access a single site (but not its subsites).
•
http://sharepoint/content/sitecollection so users can access a single site collection (including all subsites).
•
http://sharepoint/content/tenant so users can access all site collections.
7. Replace [PLACEHOLDER] with one of these values:
•
Read
•
Write
•
Manage
•
FullControl
For details about the differences between permission levels above, see the Microsoft website.
8. Click Create.
10
Register an Office 365 AppFiles Connect for Administrators
Edit the Authentication Provider in Salesforce
In Salesforce, replace the original placeholder values with the correct ones from the Office 365 app.
1. In Setup, enter Auth. Providers in the Quick Find box, then select Auth. Providers.
2. Click Edit next to the authentication provider you created previously.
3. Change the following values:
•
Consumer Key — Enter the Client ID you copied to a text file.
•
Consumer Secret — Enter the Client Secret you copied to a text file.
•
Authorize Endpoint URL — Enter the URL of the OAuthAuthorize.aspx page in Office 365. The URL format is as follows.
–
SharePoint Online: https://your company name.sharepoint.com/site collection
path/_layouts/15/OauthAuthorize.aspx
–
OneDrive for Business: https://your company
name-my.sharepoint.com/_layouts/15/OauthAuthorize.aspx
•
Token Endpoint URL — Enter a URL in the following format.
–
SharePoint Online: https://accounts.accesscontrol.windows.net/your company
name.onmicrosoft.com/tokens/OAuth/2?resource=00000003-0000-0ff1-ce00-000000000000/your
company name.sharepoint.com@your company name.onmicrosoft.com
–
OneDrive for Business: https://accounts.accesscontrol.windows.net/your company
name.onmicrosoft.com/tokens/OAuth/2?resource=00000003-0000-0ff1-ce00-000000000000/your
company name-my.sharepoint.com@your company name.onmicrosoft.com
4. Click Save.
Your authentication provider is now ready to use.
Define an External Data Source for SharePoint Online or OneDrive for
Business
EDITIONS
Available in: both Salesforce
Classic (not available in all
orgs) and Lightning
Experience
Available in: Professional,
Enterprise, Performance,
Unlimited, and Developer
Editions
USER PERMISSIONS
To define an external data
source:
• Customize Application
With Files Connect and Chatter, Salesforce can access content from Microsoft’s cloud-based systems.
1. From Setup, enter External Data Sources in the Quick Find box, then select
External Data Sources.
2. Click New External Data Source. Then set the following options.
DescriptionField
A user-friendly name for the data source
displayed in the Salesforce user interface.
Label
11
Edit the Authentication Provider in SalesforceFiles Connect for Administrators

DescriptionField
A unique identifier used to refer to this external data source
definition through the API. The Name field can contain only
Name
underscores and alphanumeric characters. It must be unique,
begin with a letter, not include spaces, not end with an
underscore, and not contain two consecutive underscores.
This entry must match the value entered in the SharePoint fields,
Managed Properties > Property Name and Alias.
Choose Files Connect: Microsoft SharePoint Online or Files
Connect: Microsoft OneDrive for Business.
Type
The URL of your SharePoint site, site collection, or web app.
The URL must begin with https. It should look like this:
https://salesforce.sharepoint.com/HRSite
Site URL
(Don’t copy the URL seen in the browser when accessing
SharePoint. It should not look like this:
https://salesforce.sharepoint.
com/HRSite/SitePages/Home.aspx)
Accesses only the site collection specified by the URL, ignoring
any other site collections. This should always be enabled if any
users are currently allowed to access the root site collection.
Exclude Other Site Collections
The identity type used to authenticate to the external data source.
Select Per User to require separate credentials for each user who
accesses the data source. (Administrators must enable the data
Identity Type
source for specific permission sets and profiles. Users then enter
their credentials when first accessing the data source.)
Select Named Principal to use the same set of credentials for
every user who accesses the data source from Salesforce.
The protocol used to access SharePoint Online.
Select OAuth 2.0.
Authentication Protocol
Enter the SharePoint Online or OneDrive for Business
authentication provider.
Authentication Provider
Leave blank.Scope
Select to immediately test your settings or to create an external
object for this external data source.
Start Authentication Flow on Save
Custom columns defined on SharePoint should not have spaces in the name. Files from a SharePoint Online or OneDrive for Business
data source can’t be previewed in the file preview player.
12
Define an External Data Source for SharePoint Online or
OneDrive for Business
Files Connect for Administrators

Include a Files Connect Data Source in Global Search
EDITIONS
Available in: both Salesforce
Classic (not available in all
orgs) and Lightning
Experience
Files Connect for
cloud-based external data
sources is available in:
Professional, Enterprise,
Performance, Unlimited,
and Developer Editions
USER PERMISSIONS
To create an external object
and provide access to its
fields:
• Customize Application
Combine searches for Salesforce data with external data from Google Drive, SharePoint, OneDrive
for Business, or Box. Developers can automate the process with supported SOQL or SOSL queries
with the API.
To include external data in global searches or API queries, first create a related external object.
External objects behave similarly to custom objects, but map to data stored outside Salesforce in
an external system like SharePoint. Each external object maps to a data table, and the object fields
map to accessible table columns.
Tip: External objects support lookup relationships similar to custom objects, letting you
integrate external data into related lists and other areas throughout Salesforce. For details,
see External Object Relationships.
To fully configure global search, you have to
•
Choose the layout for global search results
•
Create an external object from an external data source
•
Give users access to the external object fields
•
Create a custom tab for the external object (Lightning Experience Only)
By default, Files Connect external objects use the standard search results layout for Chatter and the
Files tab. If you want to display customized search layouts for these objects, complete these steps.
1. From Setup, enter Files Connect Settings in the Quick Find box, and select
Files Connect Settings.
2. Select Use External Object Search Layout.
3. Define an external data source that supports search:
•
SharePoint Online or OneDrive for Business
•
Google Drive
•
Box
4. From Setup, enter External Data Sources in the Quick Find box, and select External Data Sources.
5. To access the details page, click the data source name.
6. Click Validate and Sync.
If the Validate and Sync button is disabled, edit the Authentication Settings for External Systems to enable the Start
Authentication Flow on Save checkbox.
7. Select the table named “items_[data source].” Then, click Sync and create an external object that maps to the entire source.
Now deploy the object to make the data it contains available to users.
8. Choose Build > Develop > External Objects.
9. Click Edit next to the new external object.
10. At the bottom of the page, click Deployed, and then click Save.
11. To give users access to the external object fields:
a. From Setup, enter Permission Sets in the Quick Find box, and select Permission Sets.
b. Click a permission set in which you enabled Files Connect.
13
Include a Files Connect Data Source in Global SearchFiles Connect for Administrators
c. In the Apps section, click Object Settings.
d. Click the name of the external object.
e. Click Edit, and enable the necessary Read permissions (for the object itself, and all fields you want to reveal in Salesforce).
f. Click Save.
12. Next, create a custom tab for the external object (Lightning Experience Only):
a. From Setup, enter Tabs in the search bar, and select Tabs.
b. Click New in the Custom Object Tabs section.
c. In Step 1 of the setup wizard, enter the name of the custom object you created from your external data source.
d. In Step 2, choose the availability and visibility of the tab to profiles. The tab doesn’t need to be visible, but it does need to be
accessible. Choose either Default On or Tab Hidden.
e. Complete Step 3 and click Save.
To automate search with SOQL or SOSL, review the supported queries for your data source.
SharePoint and OneDrive external objects support these standard fields and any custom fields you enable. Queries on specific fields
return only documents that the external data source indexed.
Table 1: SOQL and SOSL Support for SharePoint and OneDrive External Objects
SortableQueryableField Name
YesYesAuthor
YesNoComment
YesYesContentLength
YesYesCreationDate
YesNoDisplayUrl
NoNoDownloadUrl
YesYesExternalId
YesYesIsFolder
YesYesMimeType
YesYesName
YesYesUpdateDate
YesYesUpdatedBy
You can also use ParentId_c as query criteria to retrieve the list of documents in a folder. However, that field isn’t displayed in query
results unless your query specifies a ParentId__c value.
Files Connect supports all standard Google Drive properties, but not custom properties. The following properties have different field
names in Salesforce external objects:
14
Include a Files Connect Data Source in Global SearchFiles Connect for Administrators
Table 2: SOQL and SOSL Support for Google Drive External Objects
Salesforce FieldGoogle Property
DisplayUrlalternateLink
CreationDatecreateDate
Commentdescription
contentStreamUridownloadURL
readOnlyeditable
ContentLengthfileSize
ExternalIdid
UpdatedBylastModifyingUserName
MimeTypemimeType
UpdateDatemodifiedDate
AuthorownerNames
contentStreamFileNameoriginalFilename
Nametitle
This subset of fields supports SOQL and SOSL queries. (None are sortable, reflecting limitations in the Google Drive API.)
•
CreationDate
•
lastViewedByMeDate
•
MimeType
•
Name
Note: Google Drive queries on the Name field support only one wildcard, %. Searches using this wildcard match only name
prefixes. For example, the title "HelloWorld" would be returned with the query Name LIKE "Hello%" but not Name
LIKE "%World".
•
sharedWithMe
Note: Queries on the sharedWithMe field with a value of "false" are not supported, protecting confidential data.
•
starred
•
UpdateDate
15
Include a Files Connect Data Source in Global SearchFiles Connect for Administrators

Include SharePoint Custom Properties in Search, SOQL, and SOSL
Queries
EDITIONS
Available in: both Salesforce
Classic (not available in all
orgs) and Lightning
Experience
Files Connect for
cloud-based external data
sources is available in:
Professional, Enterprise,
Performance, Unlimited,
and Developer Editions
USER PERMISSIONS
To create an external object
and provide access to its
fields:
• Customize Application
After you create an external object for a SharePoint data source, some special steps are needed to
search or query any custom properties it contains.
Configuring Custom Properties in SharePoint
If you have the existing mapped custom columns and Office documents' (Microsoft Word, Excel,
etc.) metadata in SharePoint, external objects in Salesforce let you select and filter on the following
custom properties:
•
Custom columns defined in a Custom Content Type
•
Metadata from Microsoft Word, Excel, and other Office documents
To search on these custom properties in Salesforce, a Sharepoint administrator must create a
corresponding Managed Property.
•
To display these properties in external object fields, or use them in SOQL or SOSL SELECT
queries, set the corresponding Managed Property to Retrievable.
•
To filter on these properties in external objects, or use them as query criteria in a SOQL or SOSL
WHERE clause, set the corresponding Managed Property to Queryable.
Querying Resulting Fields in Salesforce for SharePoint
Online
In the following example, CustomProperty stands for the Custom column name defined in the Custom Content Type, or the Office
document metadata name. ManagedCustomProperty stands for the corresponding Managed Property name.
In most cases, you can use ManagedCustomProperty for both the SELECT and WHERE clause. Here’s a SOQL example:
SELECT ManagedCustomProperty FROM items_spOnline_x WHERE ManagedCustomProperty=...
However, for file types that SharePoint doesn’t index for search, such as .jpg, .png, and .pdf files, you must use CustomProperty in
the SELECT clause and ManagedCustomProperty in the WHERE clause. As a workaround, you can define an alias on the
Managed Property in SharePoint and format queries like this:
SELECT Alias FROM items_spOnline WHERE Alias=...
Normally, custom properties aren’t displayed on external object detail pages—defining an alias also addresses this issue.
Boolean Custom Properties
When using boolean (Yes/No) custom properties with a corresponding Managed Property set to the Text type, the corresponding
external object field must be set to the Text type as well. In filters, the values “0” and ”1” equal false and true, respectively. For example:
WHERE customBooleanWithTextManagedProperty=”1”
16
Include SharePoint Custom Properties in Search, SOQL, and
SOSL Queries
Files Connect for Administrators

“0” and ”1” are also displayed as results, however, so boolean custom properties should use a Managed Property type of YesNo. Set the
corresponding external object field to Checkbox to query it with standard true or false values. For example:
WHERE customBooleanWithYesNoManagedProperty=true
Metadata in Microsoft Office Documents
The Sharepoint Search service returns all metadata from Office documents as strings, so corresponding external object fields must be
set to the Text type.
Dates are returned in the format, MM/DD/YYYY hh:mm:ss AM/PM, (for example, “3/31/2015 9:59:00 PM”). To query on fields using the
Date type, the external object must include a corresponding Date field for filtering, and a Text field for selecting.
Limitations for Specific SharePoint Property Types in Salesforce for SharePoint
Online
•
Number, Currency, and Choice multiple properties can’t be selected for file types SharePoint doesn’t index for search. By default,
this includes image, video, and .pdf files, although .pdf files are natively indexed starting with SharePoint 2013.
•
Multiple Line of Text, URL, and Date properties aren’t queryable.
•
Choice multiple and URL properties can’t be selected.
17
Include SharePoint Custom Properties in Search, SOQL, and
SOSL Queries
Files Connect for Administrators
FILES CONNECT FOR USERS
Set Up Authentication to an External Data Source
EDITIONS
Available in: both Salesforce
Classic (not available in all
orgs) and Lightning
Experience
Files Connect for
cloud-based external data
sources is available in:
Professional, Enterprise,
Performance, Unlimited,
and Developer Editions
USER PERMISSIONS
To access cloud-based data
sources like SharePoint
Online:
• Files Connect Cloud
When you connect to a Files Connect external data system for the first time, you can set up your
authentication in just a few clicks.
If you haven’t set up your authentication to an external data system in My Settings, you’re prompted
to authenticate the first time you try to access an external system in Salesforce. Click the link or
button to complete most of the authentication automatically.
•
If you are connecting to Box, Google Drive, SharePoint Online, or OneDrive for Business: Select
OAuth 2.0 as the authentication protocol.
•
When you see a message requesting permission for Salesforce to access information from your
external system, click Allow.
•
After the authentication process has finished, you are redirected to Salesforce.
18
Manage Your Files Connect External Data Source Authentication
Credentials
EDITIONS
Available in: both Salesforce
Classic (not available in all
orgs) and Lightning
Experience
Files Connect for
cloud-based external data
sources is available in:
Professional, Enterprise,
Performance, Unlimited,
and Developer Editions
USER PERMISSIONS
To access cloud-based data
sources like SharePoint
Online:
• Files Connect Cloud
You or your Salesforce admin can use Files Connect to set up and manage your authentication
settings for external data sources. With valid authentication settings, you can access files from
external systems right from Salesforce.
Your admin defines external systems in external data sources and named credentials. Before you
begin, your administrator:
•
Sets up the external data source or named credential to use per-user authentication.
•
Grants you access to the external data source or named credential.
•
Tells you the authentication settings to enter.
If you don’t see the expected settings or options, ask your admin for help.
1. From My Settings, enter Authentication in the Quick Find box, then select
Authentication Settings for External Systems.
2. To set up a new connection, click New. To modify an existing external data source, click Edit.
3. From the External System Definition menu, select “External Data Source.”
4. From the External Data Source menu, select a data source that your administrator
created.
5. Set the options for the authentication protocol required by Box, Google Drive, SharePoint Online,
or OneDrive for Business.
Choose OAuth 2.0Authentication Protocol
Choose the provider that your administrator created for this data sourceAuthentication Provider
Leave blankScope
Select to immediately verify your login credentials with the external data source.
When you click Save, the external system prompts you to log in. After successful login, the
external system grants you an OAuth token for accessing its data from this org.
Start Authentication
Flow on Save
Redo the OAuth flow when you need a new token—for example, when the token
expires—or if you edit the Scope or Authentication Provider fields.
6. Click Save.
19
Manage Your Files Connect External Data Source
Authentication Credentials
Files Connect for Users

Access and Share Files Connect External Files
EDITIONS
Available in: both Salesforce
Classic (not available in all
orgs) and Lightning
Experience
Files Connect for
cloud-based external data
sources is available in:
Professional, Enterprise,
Performance, Unlimited,
and Developer Editions
USER PERMISSIONS
To access cloud-based data
sources like SharePoint
Online:
• Files Connect Cloud
After your admin enables Files Connect, you can access files from external sources, like Google Drive
and SharePoint, or share them through feeds and Files home.
Download or Share Files on Files Home
Download external files to your local system or share them with a set of people in your org from
Files home.
1. Navigate to Files home.
2. The External Files list in the left column shows available external data sources. Select one and
navigate through the folders, or use the search bar to find a file.
Note:
•
Salesforce supports Google documents, spreadsheets, presentations, and drawings.
In the Recent list, Google Drive content is limited to the 24 most recently accessed
documents from the last 30 days.
•
SharePoint folders with special characters, such as # or %, appear in the list, but you
can’t see or access any files in them.
3.
Click next to the file name, and choose one of the following:
•
Open the file in the external data source, such as SharePoint.
•
Download the file to your local system.
•
Share the file either as a copy or as a reference. Your admin has determined which type of sharing is used in your org. When
sharing, you do one of the following:
–
Share a copy of the external file stored in Salesforce. If files are shared with a Chatter group, all group members can access
the files, even if members lack access to the external system. Salesforce Files doesn’t reflect any revisions to the file in external
systems.
–
Share a reference to the external file stored outside Salesforce. Only users with access to the external system can download
files. (Users must enter credentials for the system in the Authentication Settings for External Systems section of personal
setup). Salesforce Files doesn’t reflect revisions to the file in external systems, but the reference points to the latest file version
in those systems.
Note: To download files referenced from an external system, users must enter credentials for the system in the Authentication
Settings for External Systems section of personal setup.
When a user selects an external file from the file selector, a file reference or copy is created in Salesforce. If a file reference exists,
it’s reused.
Share Files in the Feed
If you want to include external files in a specific Chatter conversation, use the feed. All files shared in the feed are either copies or
references, as determined by your admin.
In Salesforce Classic
1. While authoring a post, click File above the feed, and then click Select a file from Salesforce.
20
Access and Share Files Connect External FilesFiles Connect for Users
2. In the left column, click the external source, such as SharePoint.
3. Next to the file you want to share, click Attach.
4. In the body of your post, @mention the groups or people you want to share with.
In Lightning Experience
1. While authoring a post, click the paperclip icon below the post to open the Select File window.
2. From the left column, click the external source, such as SharePoint or Google Drive.
3. Select the file you want to share, and click Add.
4. In the body of your post, @mention groups or people that you want to share with.
21
Access and Share Files Connect External FilesFiles Connect for Users
When you paste a link to an external document into a Chatter post, it’s converted into a Files Connect file reference. Under the body of
your post, the file title and icon appear. Click the icon to open the file preview right from your feed. A file reference is created for the first
link in each post. File references are not created for links in comments.
Note: File previews are only available for files connected through Sharepoint, Google Drive, and Quip integrations.
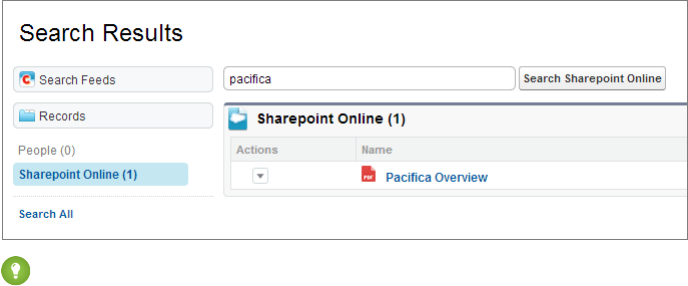
Search for Files Connect External Files
EDITIONS
Available in: both Salesforce
Classic (not available in all
orgs) and Lightning
Experience
Files Connect for
cloud-based external data
sources is available in:
Professional, Enterprise,
Performance, Unlimited,
and Developer Editions
USER PERMISSIONS
To access cloud-based data
sources like SharePoint
Online:
• Files Connect Cloud
Search an external data source, like Google Drive, Box, or SharePoint, right within Salesforce.
Search in a Specific External Data Source
In Salesforce Classic:
1. From the left column of Files home or your Chatter feed, click the data source name.
2. In the search box, enter terms such as document title or author. (The specific information that
you can search for depends on the configuration of the external data source.)
Note: You can also search external data sources from the file selector when attaching a file
to a Chatter post. In Salesforce Classic, click File above the feed, and then select a file from
Salesforce. In Lightning Experience, click the paperclip icon below the post to open the Select
File window.
Search Globally for Salesforce and External Data
If your administrator enables global search for an external data source, you can search its contents along with your Salesforce data.
In Salesforce Classic:
1. In the global search box at the top of the Salesforce window, enter your search terms.
2. To filter the results down to a specific external data source, click its name in the left column (for example, “SharePoint Online”).
22
Search for Files Connect External FilesFiles Connect for Users
Tip: If you often want to see content from a specific external data source, pin it to the top of global search results. To pin it, in the
left column, hover over the data source name, and click the pin icon. (If you don’t see the data source listed, click Search All.)
In Lightning Experience:
1. From Files home, enter a search term into the global search box in the header.
2. Optionally, filter your search results to return only Files.
•
Select in Files after entering your search in the global search box.
•
Do a global search and then select Files from the global search results.
•
Select Files from the global search Suggested For You menu, and then enter your search term.
23
Search for Files Connect External FilesFiles Connect for Users
