Organizing Your Google Drive – User Guide
1
Over time, your Google Drive can accrue tons of files and become a mess to find
anything. No matter how disorganized your Google Drive is, you can quickly put a stop
to the clutter and whip everything back into a neat and organized structure. Gone are
the days when you feel overwhelmed every time you open Google Drive. Here’s how to
organize your Drive to find everything fast and make sure it stays in order.
Content:
o
Organizing your Files into Folders – p. 1
o
Renaming Folders or Files – p. 4
o
Deleting Files you Don’t Need – p. 4
o
Starring Important Files and Folders – p. 5
o
Color-coding your Folders – p. 7
o
Organizing “Shared With You” Files/Folders into your Drive – p. 8
o
Shared Drives – p. 10
o
Video Tutorials to Help your Organizing Efforts – p. 10
Organize Your Files into Folders
One of the easiest ways to organize your Google Drive is to create category-specific
folders. For example, you could have separate folders for research projects, courses,
committees or other descriptions to help you locate files. This is just like creating file
folders systems on your computer. Come up with a system that makes sense for you.
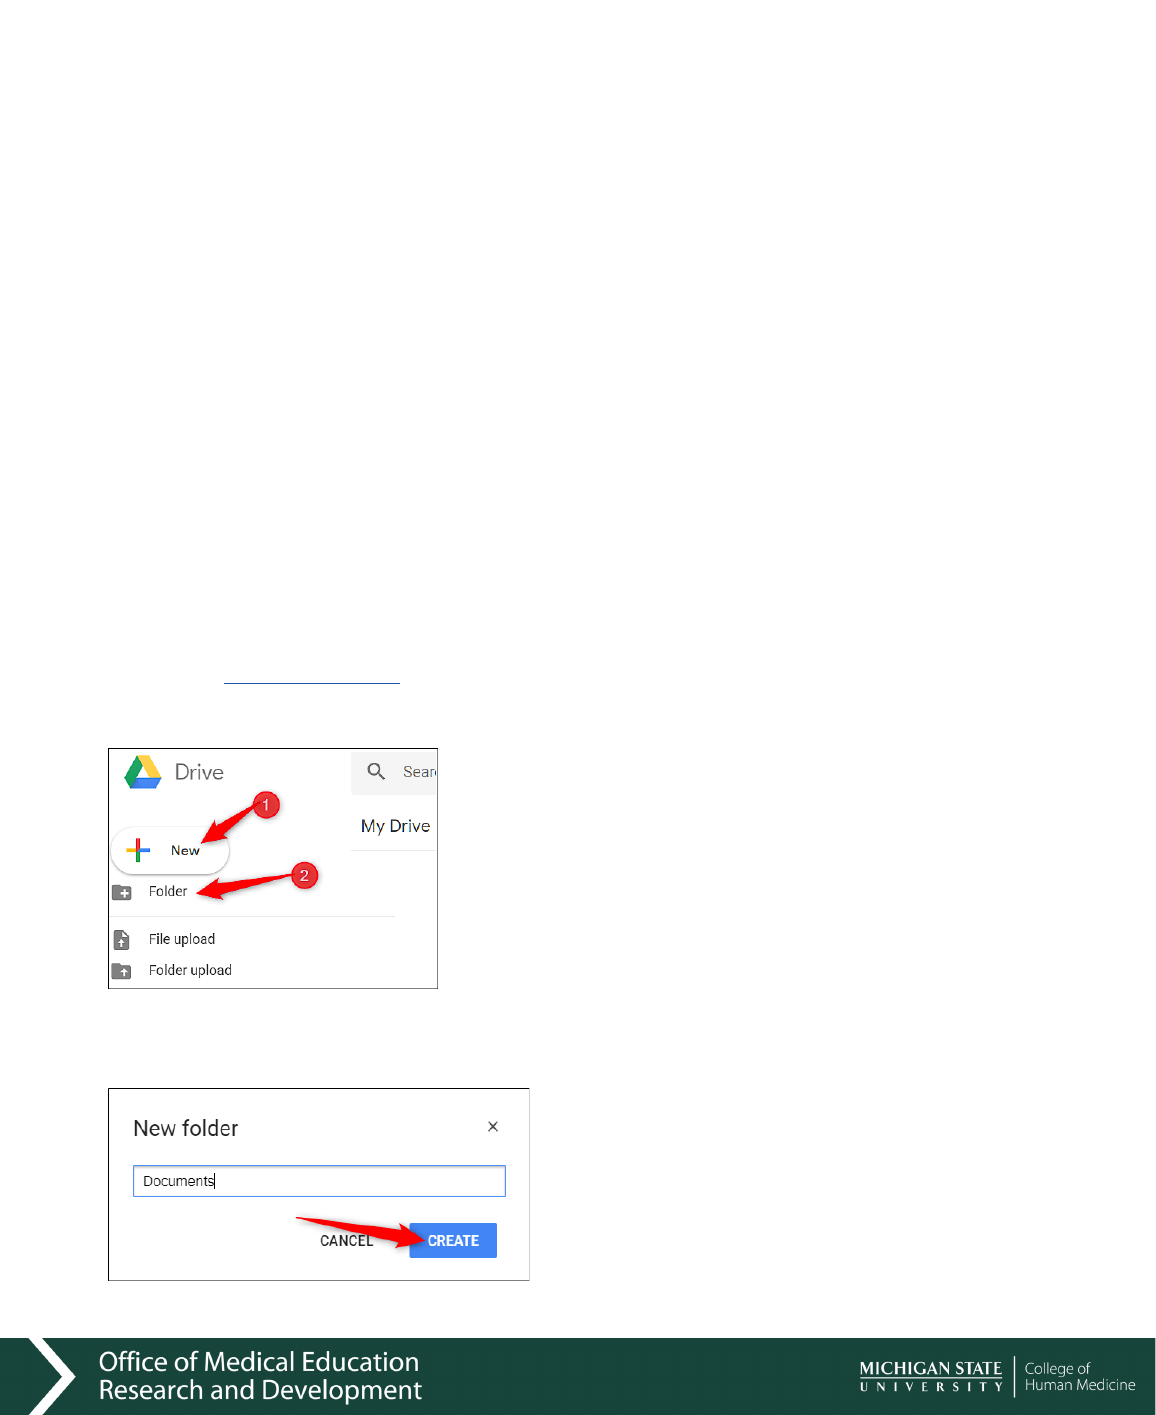
From your
Drive homepage,
click the “New” button in the top left, and then click
“Folder.”
Enter a name for the folder and click “Create.”

Organizing Your Google Drive – User Guide
2
From here, drag the files you want to add directly into the new folder you created.
If you have a few files in other folders already and want to relocate them, no problem.
Select the files, right-click, and then choose “Move To.”
Navigate to the destination folder, click it, and then select “Move” to transfer all the
selected files to that folder.
Organizing Your Google Drive – User Guide
3
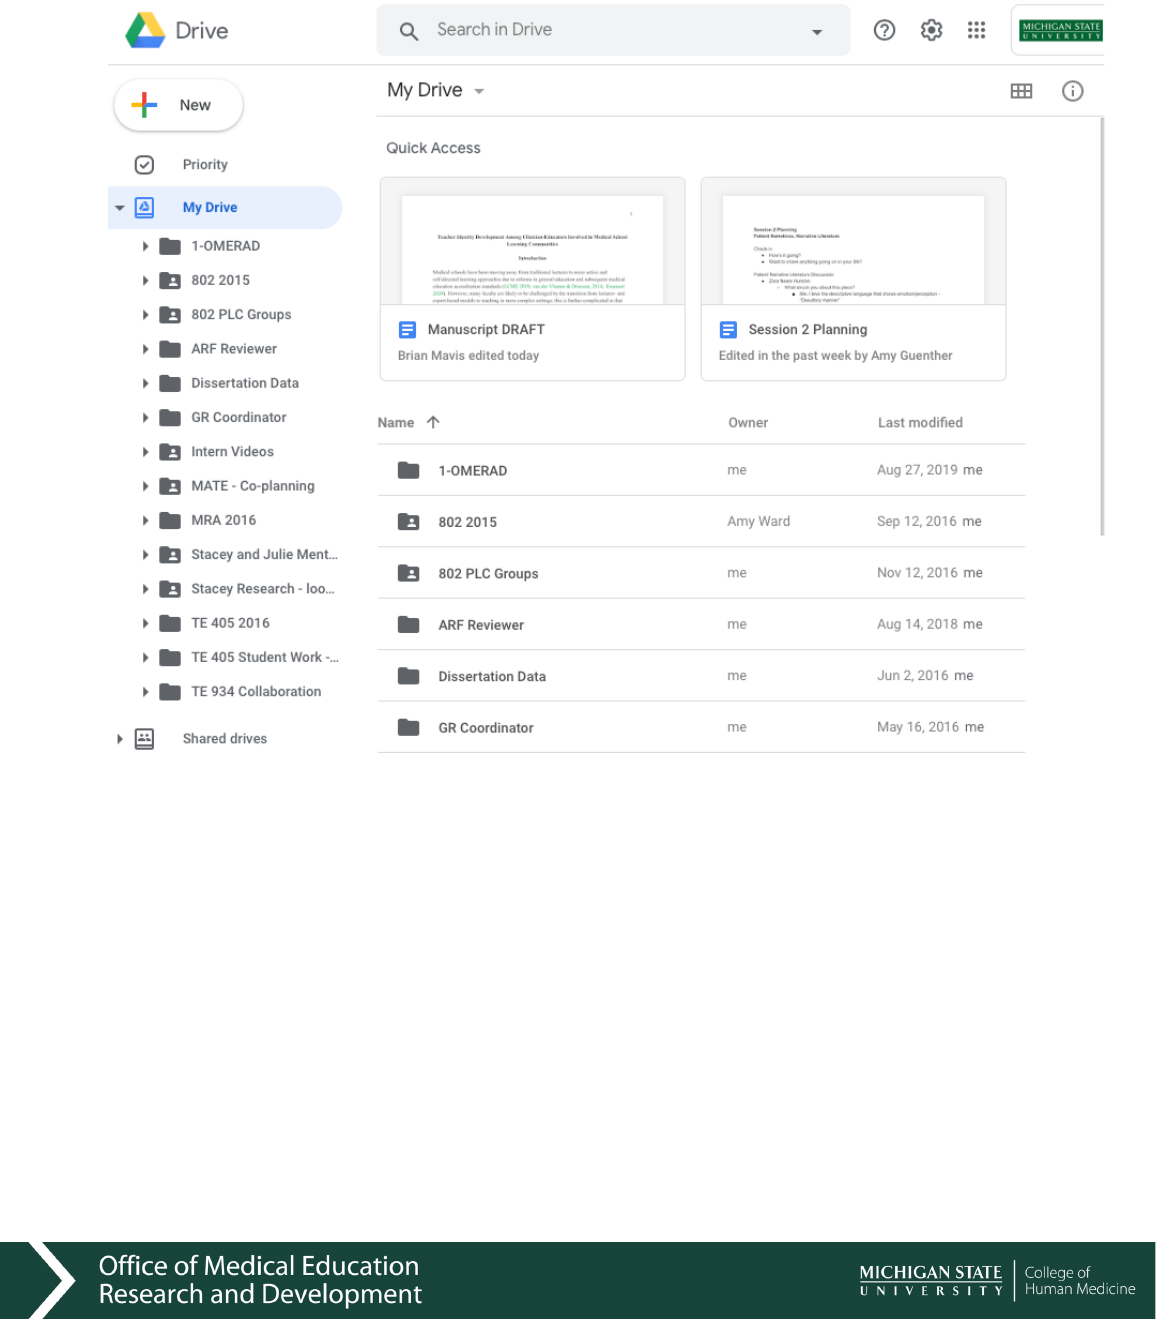
When you are done organizing, you will see your filing system both in the right sidebar
and in the main viewing area (see below).
Helpful Tip: If it is a file you go to often and it is way down the list due to alpha order, I
put a 1 - in front of it to make it move to the top for quick access. See how I did that with
the 1-OMERAD file?
Organizing Your Google Drive – User Guide
4
Rename Folders or Files: Use a Naming Convention
Try to use a naming convention that helps you easily differentiate files and folders from
each other. When you start to accumulate more items in your Drive, thoughtful names
could save you from opening several files while you try to locate a specific one. Having
multiple spreadsheets with extremely ambiguous names isn’t a helpful way to find
anything in a pinch.
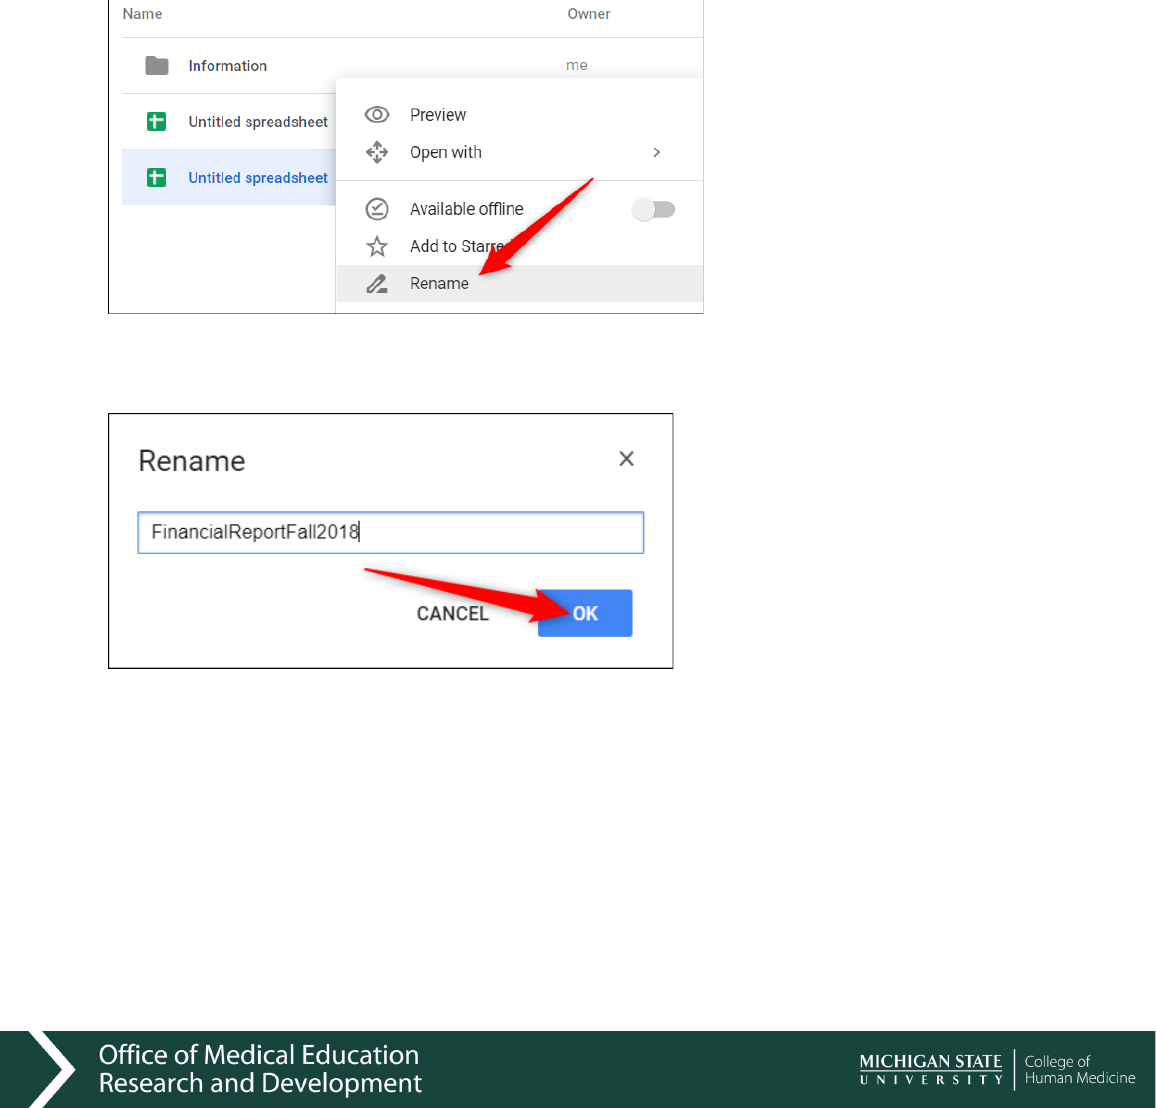
To change a file’s or folder’s name, right-click a file or folder and click “Rename.”
Give the file or folder a short and descriptive name, and then click “OK.”
Remember to keep a consistent and descriptive naming scheme to make it obvious
where to find specific items and what the actual file contains.
Delete Files You Don’t Need
After you move your important files into more distinguishable folder categories, you
might have some leftover duplicate or unnecessary documents in your Drive. This is
when you can delete those potentially unneeded files still hogging up space.
Organizing Your Google Drive – User Guide
5
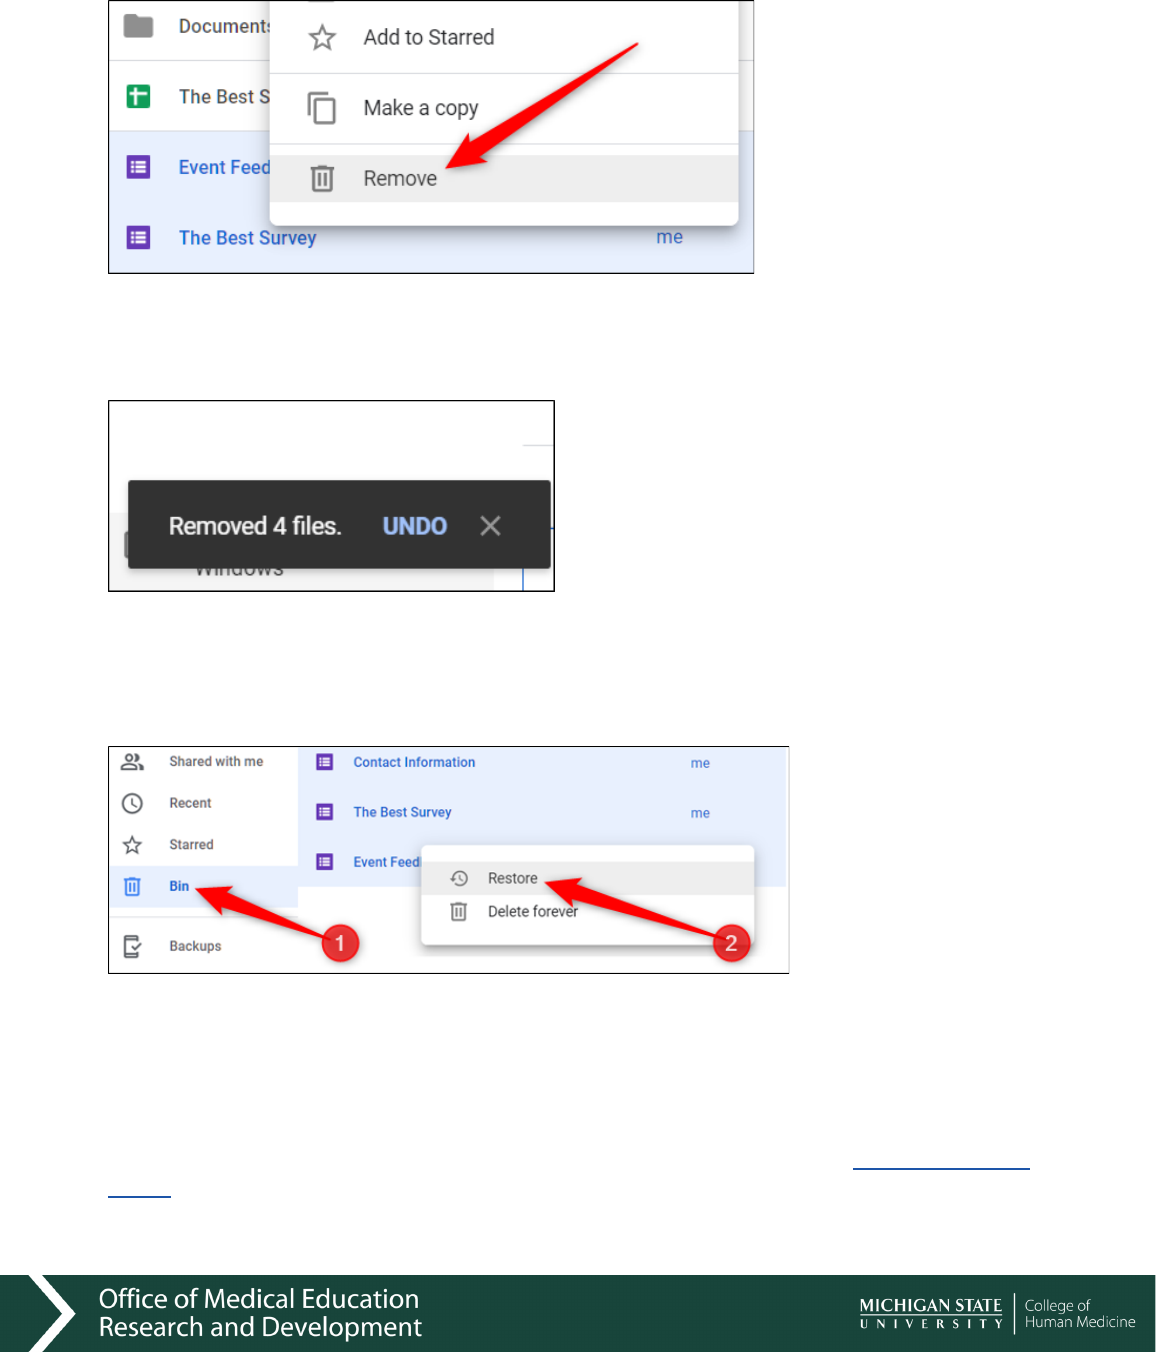
All you have to do is highlight the file, right-click it, and then select “Remove.”
Drive doesn’t provide you with a confirmation prompt when you delete files but does
give you the chance to undo a delete. Click “Undo” to reverse the deletion.
If you miss the opportunity to click “Undo” after you remove some files, click the “Bin”
button located in the menu bar, right-click on the files you want to bring back, and then
click “Restore.”
The previously deleted files will now return to your Drive from where they came.
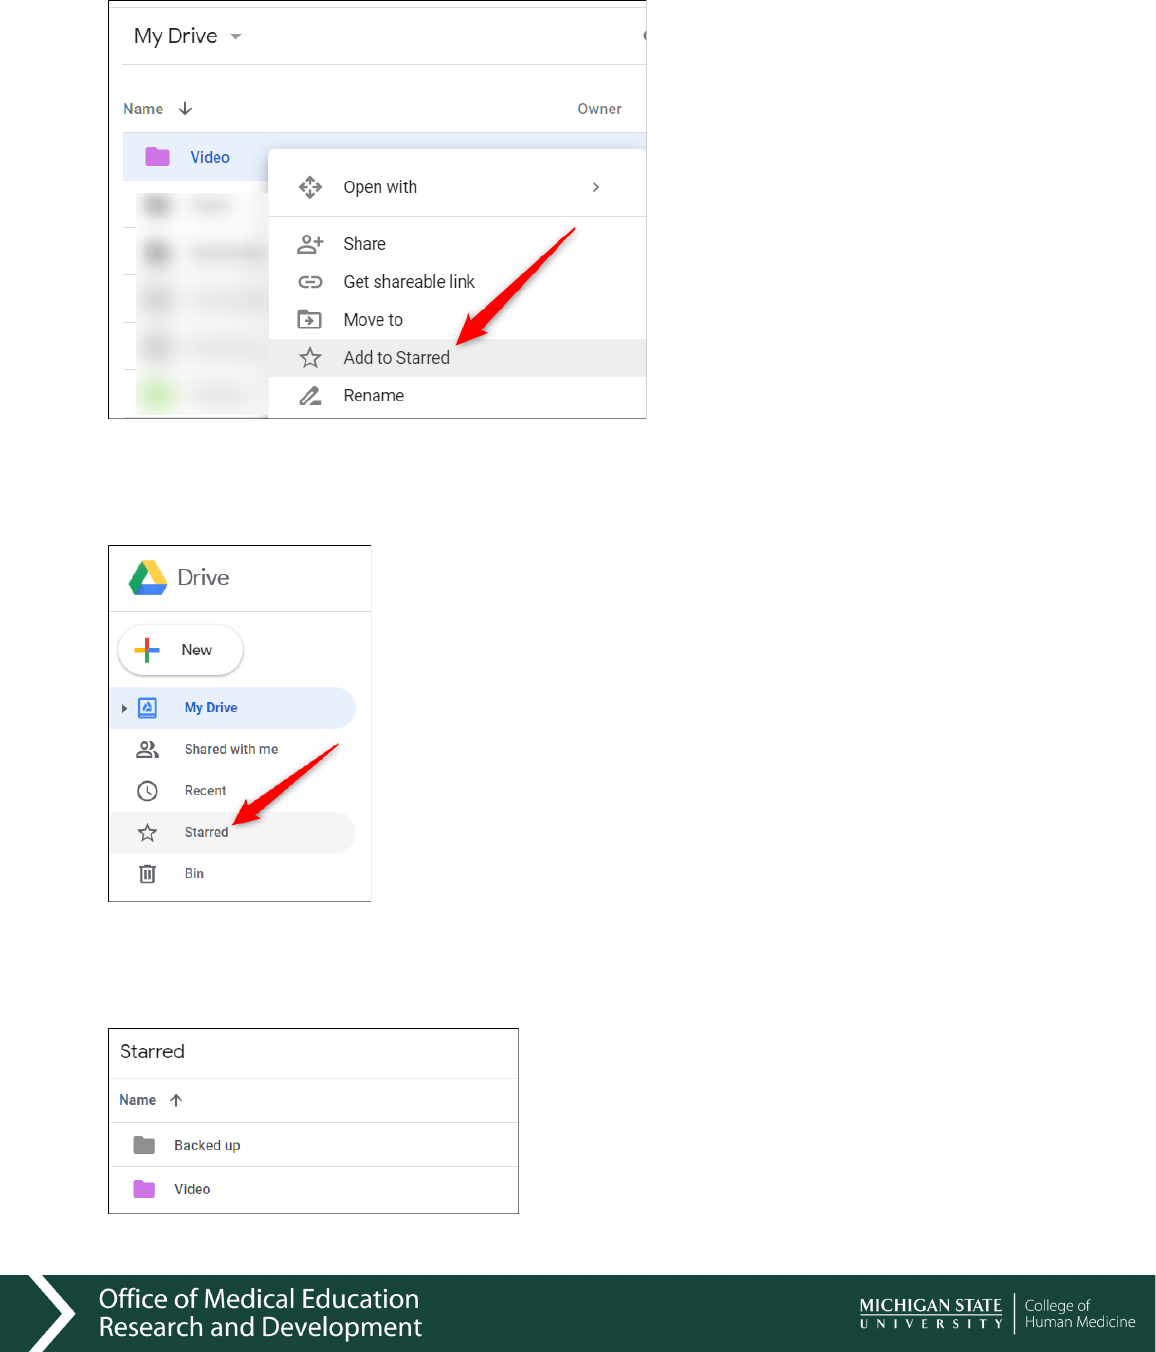
Star Important Files and Folders
Starring essential files and folders in Google Drive works the same as
starred emails in
Gmail.
When you star something, Drive adds it to a special “Starred” section that you
can access directly from the menu pane on the left side.
Organizing Your Google Drive – User Guide
6
Right-click on a file or folder and then select “Add to Starred.”
You can view the starred items by clicking on “Starred” in the pane on the left side of the
screen.
The item stays in its current place and Drive essentially creates a symbolic link—much
like we did in the previous section—to the original that shows up in “Starred.”
Organizing Your Google Drive – User Guide
7
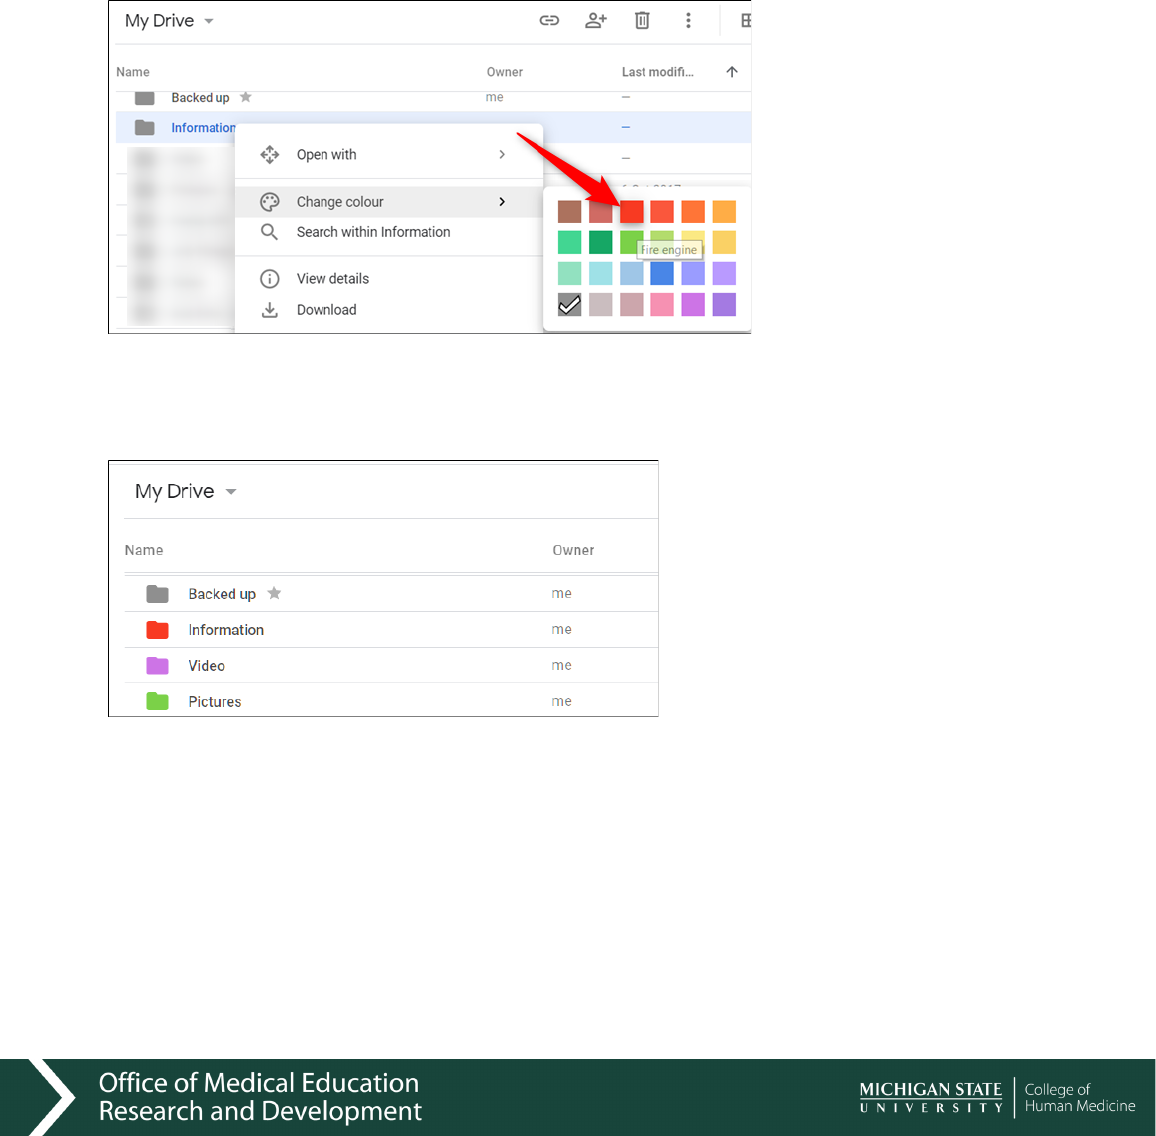
Color-Code Your Folders
By default, Google Drive uses grey for all folders. While folder color isn’t a make or
break detail, you can color-code them to recognize a folder easier and make it stand out
from all the rest. You have the choice of 24 colors to put a little pizzazz into your Drive.
Right-click on a folder, hover over “Change Color,” and then choose from one of the
colors provided.
The folder changes to the color you chose. This option is available for every folder in
your Drive.
Organizing Your Google Drive – User Guide
8
Organizing “Shared with Me” Files/Folders
Google Drive users love the ability to share files and folders with
collaborators, however, keeping Google Drive organized can be
difficult. This is particularly true for files or folders that are shared
with you. The “Shared with Me” section of Google Drive lists items
in date order which leads to frustration when people go looking for
shared files. To add to the difficulty, files and folders located in
“Shared with Me” cannot be retrieved using Drive’s powerful search
tool. Many regular Drive users remain unaware that “Shared
with Me” files can be added to and organized in your Google
Drive using the “Add to Drive” option.
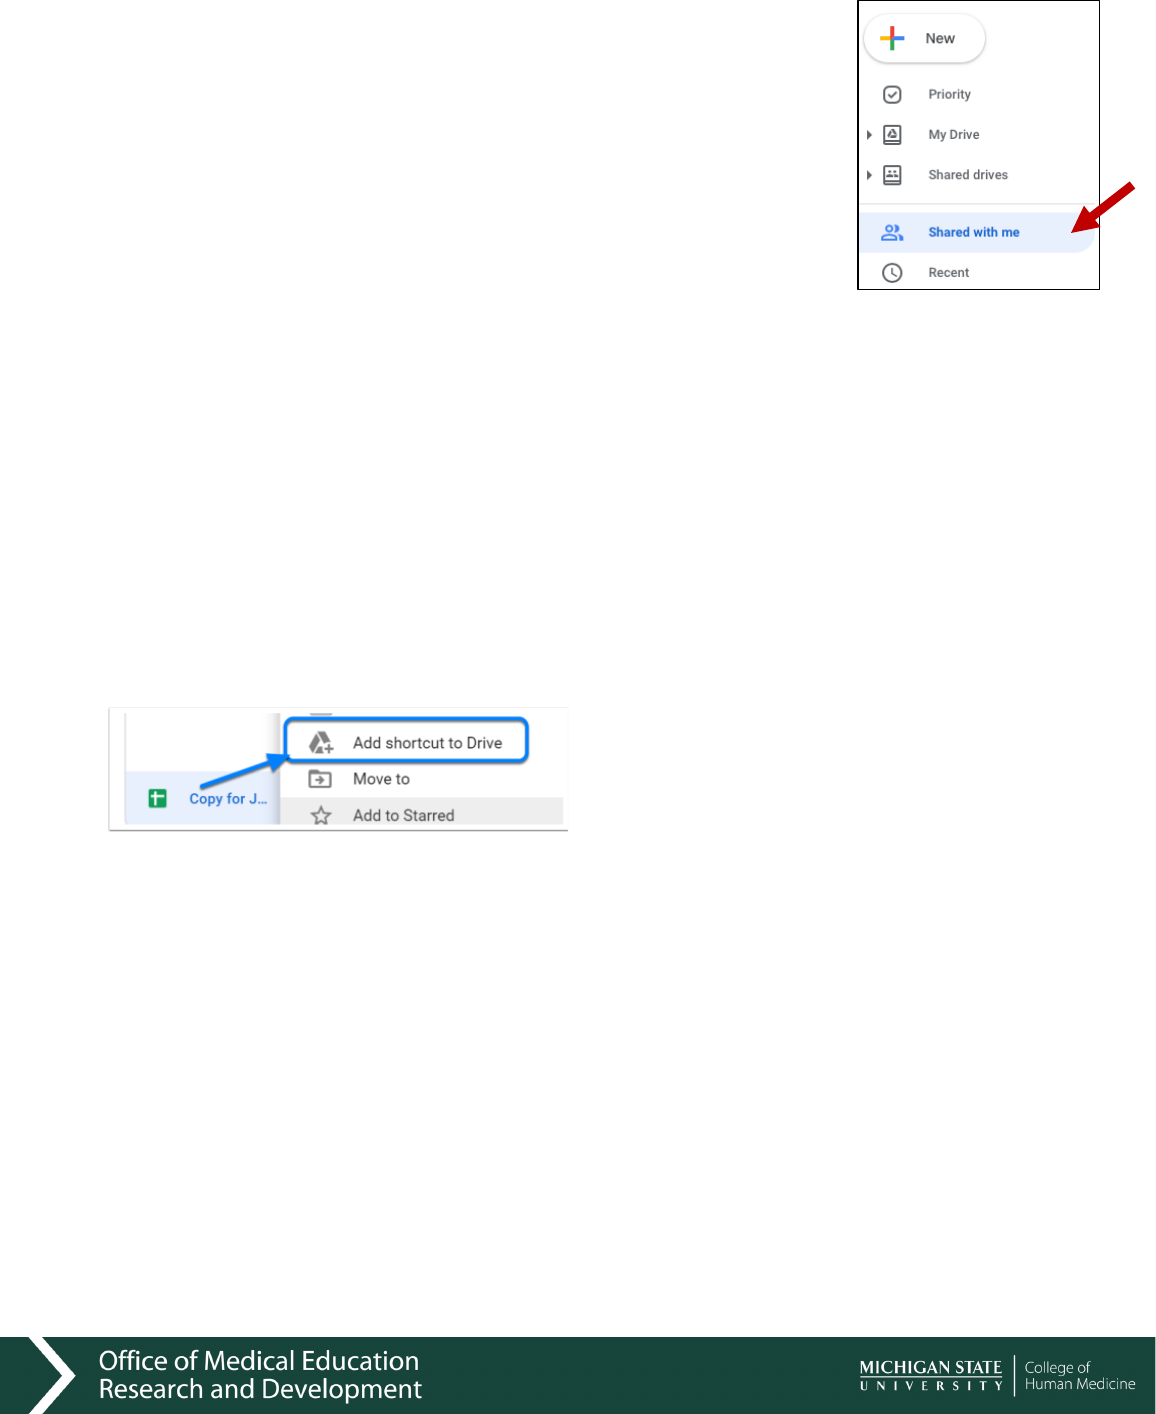
Adding Shared Files to Google Drive
Using the “Add to Drive” option, you can “move” files or folders from “Shared with me” to
any location within your Google Drive, making items easier to find when you need them.
1.
Locate the file in Shared with Me
2.
Right click (Command Click for Macs) on the file or folder
3.
From the menu, choose “+ Add Shortcut to Drive”
4.
File or folder will move to “My Drive” or you can choose “Organize” to choose a
specific location
NOTE: File or folder you Add to Drive will remain listed in Shared with Me. This is
because Shared with Me is a label indicating a file originated from someone else.
Organizing Your Google Drive – User Guide
9
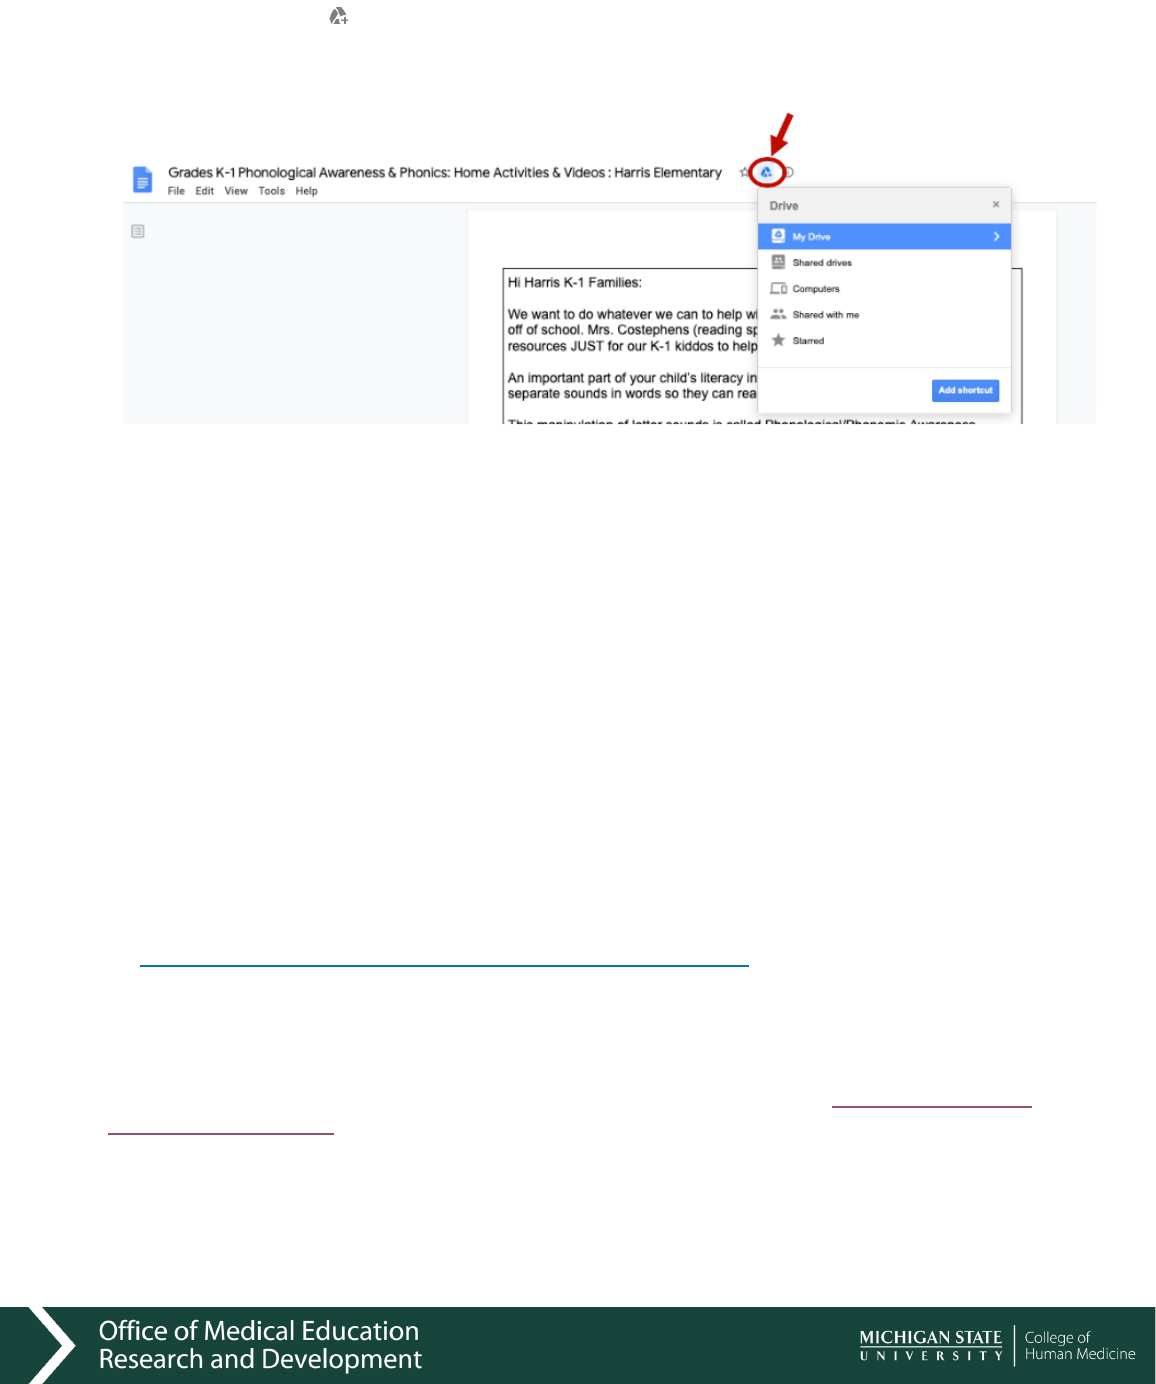
Alternatively, when viewing a shared file that you found by clicking a link in an email.
You can click on the icon next to the file name at the top left of the screen after the
file name. You will then be given the option of where (what folder) you would like to
save it to within your Drive. Then click “Add shortcut”.
Not a Copy
Using the “Add Shortcut to Drive” option for shared or View only files (or folders), allows
you to place the file (or folder) into your Drive in a location that makes sense for
you. Some important things to understand about “Add to Drive” feature:
o
It does not create a copy of the file/folder
o
It is a link back to the actual file (or folder), so that it is always the most up to
date version
o
It does not move the file/folder for collaborators, so no need to worry that you
will cause a problem for others sharing the file
o
If you have “Edit” permissions on the file/folder that you “Add to Drive” then any
changes you make, such as edits to a file, adding new items into a shared
folder, will be reflected for all collaborators of that file/folder.
Adding Individual Files from a Shared Folder
When folders are shared with you, these can also be added to your Drive. If your goal
is to move only certain files within a shared folder into your Drive, you will need to do
so
using the “Shift” + “z” command to “Add to” another folder
, so that you do not
inadvertently remove files for other collaborators.
Video Tutorial – Organizing Shared with Me Files in Google Drive
To learn more about how to organize shared files, take a look at the
Organizing Shared
with Me tutorial video.
Organizing Your Google Drive – User Guide
10
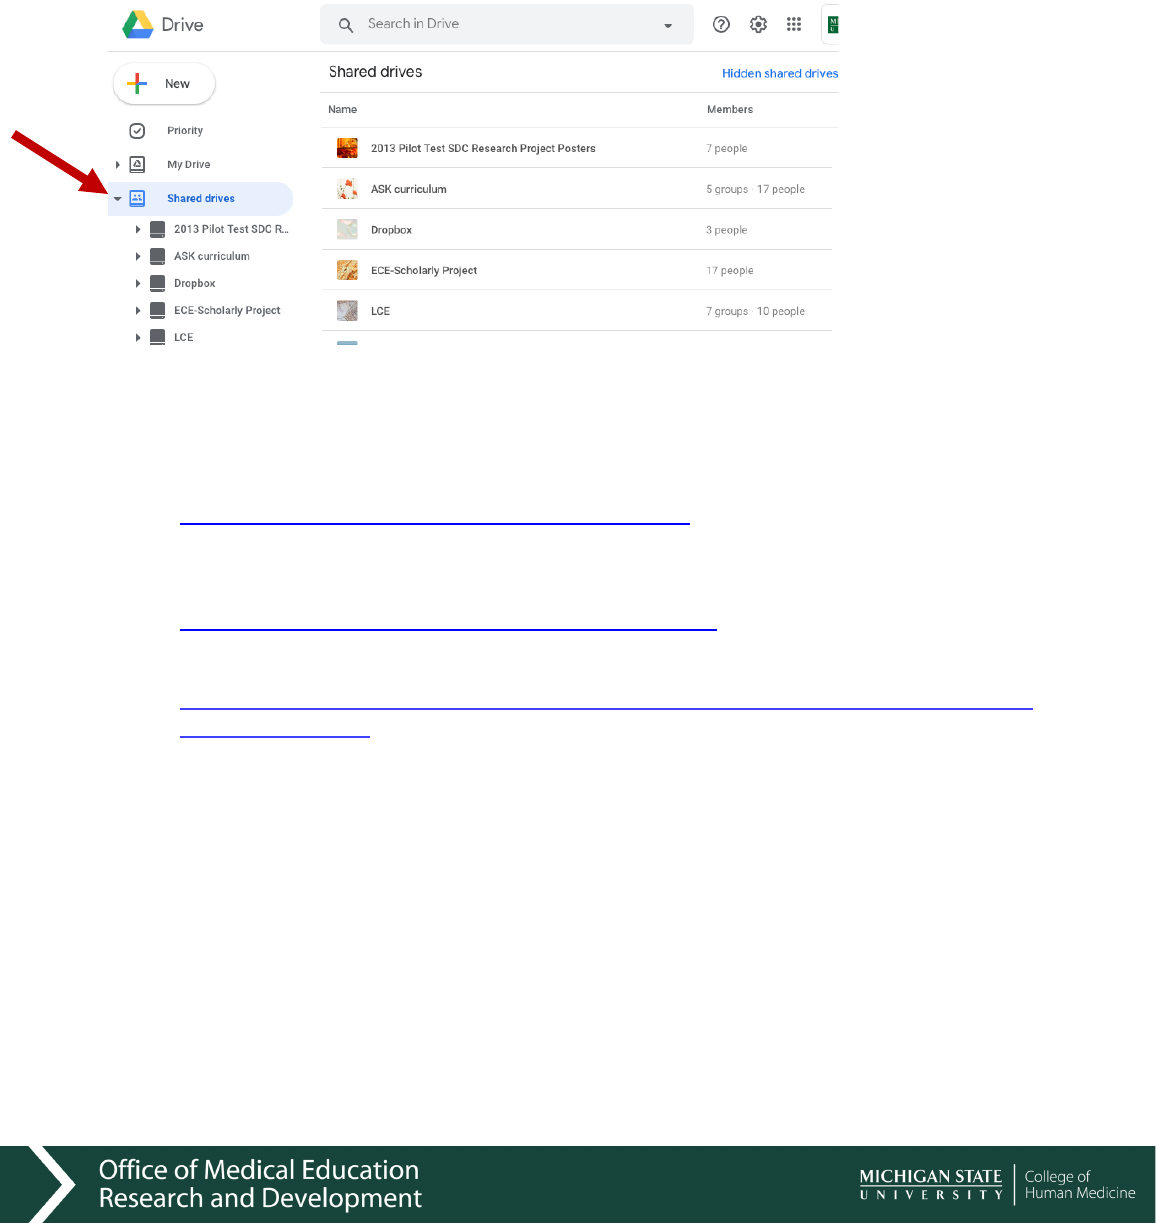
Shared Drives
As MSU Faculty we also have a feature called Shared Drives found in the right sidebar
below your Google Drive. These drives work just like Google Drive in that they are live
documents on which to collaborate. These are often created for shared projects.
Video Tutorials to Help your Organizing Efforts
o
5 Tips to help you Organize Your Drive (8 minutes – don’t worry about Tip 4)
https://www.youtube.com/watch?v=DpI0tsbH4hI
o
Google Drive Tips & Tricks to Save you Time (12 minutes – Tip 5 is for Gmail
and less helpful for MSU email users)
https://www.youtube.com/watch?v=3Rry1205mW0
o
Organizing Shared with Me Files (3+ minutes)
https://www.youtube.com/watch?list=PL5ybNyowvZQePkOI8OCExLk6lA9pWJZi
d&v=IgDS2rq152I
