
Multi-Factor Authentication with Authenticator
App (Recommended)
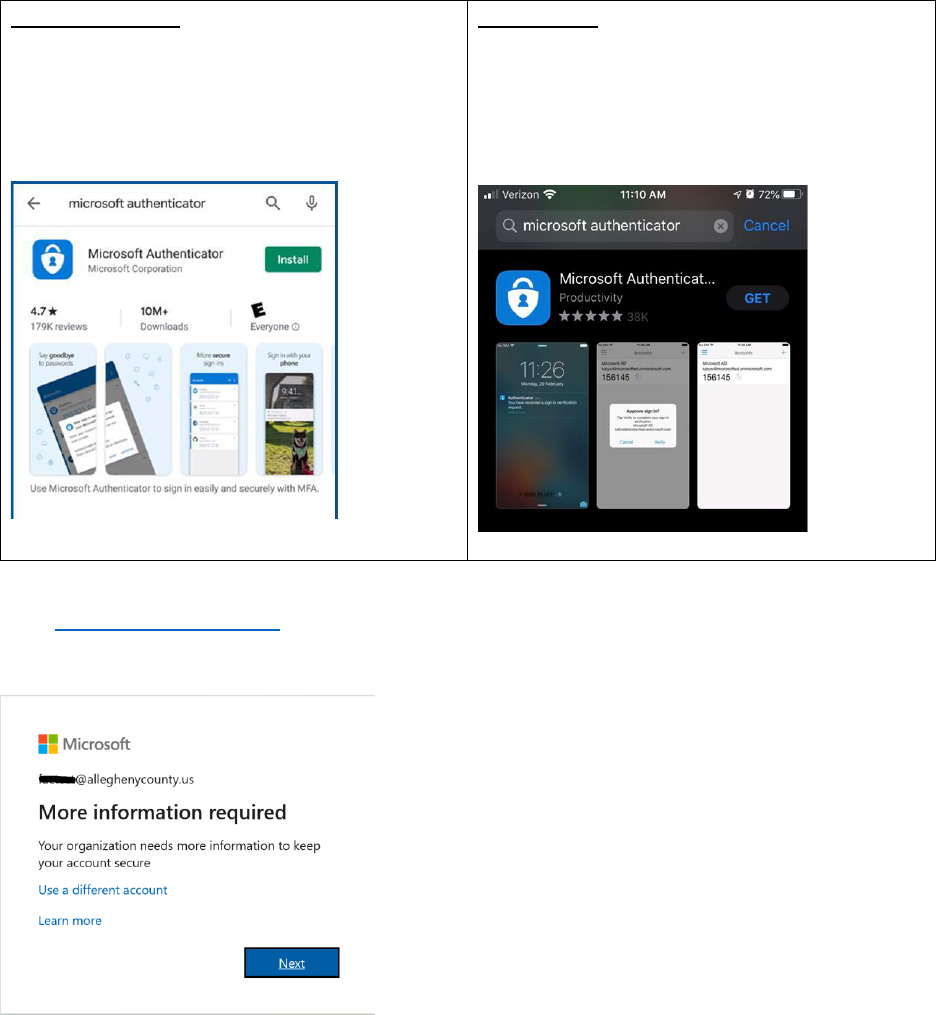
Make sure to install the Microsoft Authenticator app before starting this MFA enrollment process.
Android Devices:
- Open Play Store
- Search for Microsoft Authenticator
- Tap Install
iOS devices:
- Open App Store
- Search for Microsoft Authenticator
- Tap Get
Go to https://aka.ms/mfasetup and sign in.
If you have not enrolled in MFA the “More information required” prompt will appear, click Next.
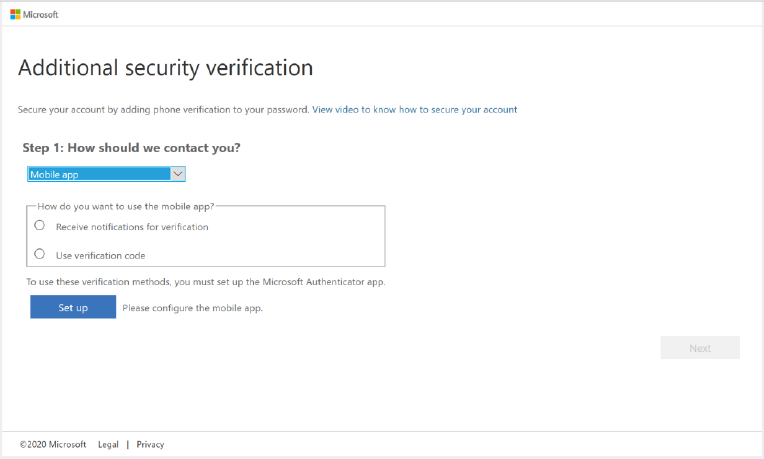
Step 1.
Select Mobile App from the drop-down menu.
Next select whether you want to “Receive notifications for verification” (recommended) or “Use
verification code”.
The difference between the options is the former will allow you to approve/deny the verifications
from within the app (recommended). The latter option provides a verification code which you
will have to type into the MFA verification prompt during the logon process to Office 365 apps
and websites.
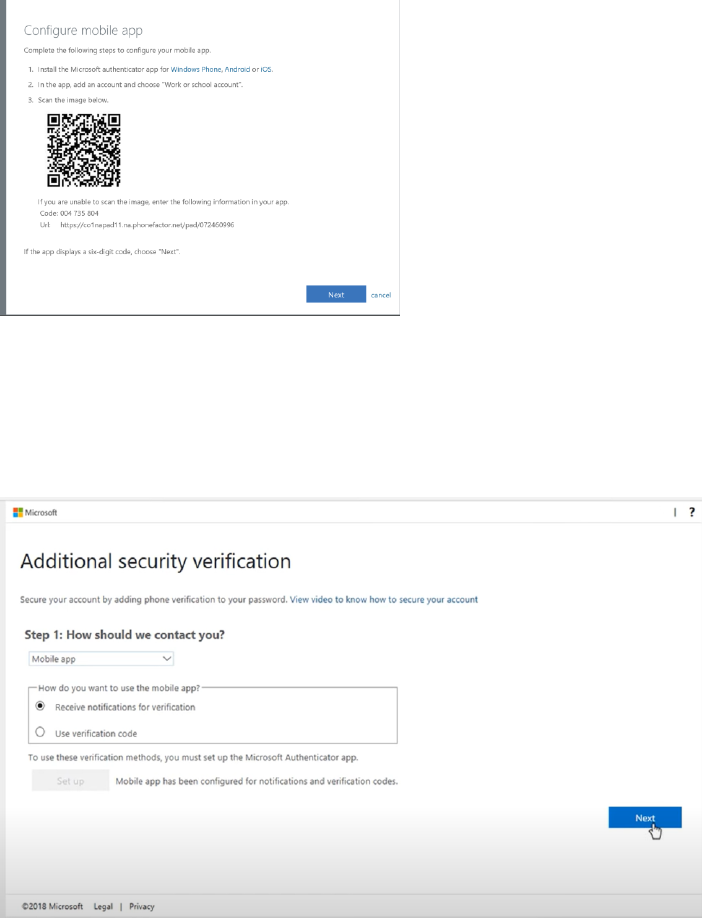
Next click the “Set up” button. A window will appear with a barcode. Follow the instructions in the
window to configure the app.
Open the Microsoft authenticator app on your phone, select add account and choose “Work or
school account”. Scan the barcode using the phones camera (note you may be prompted to
allow the app to access your phones camera).
Once you see the six-digit code in the app click the Next button.
After the authenticator app has been configured on the phone, it needs to be verified. Click the Next
button to continue to Step 2.
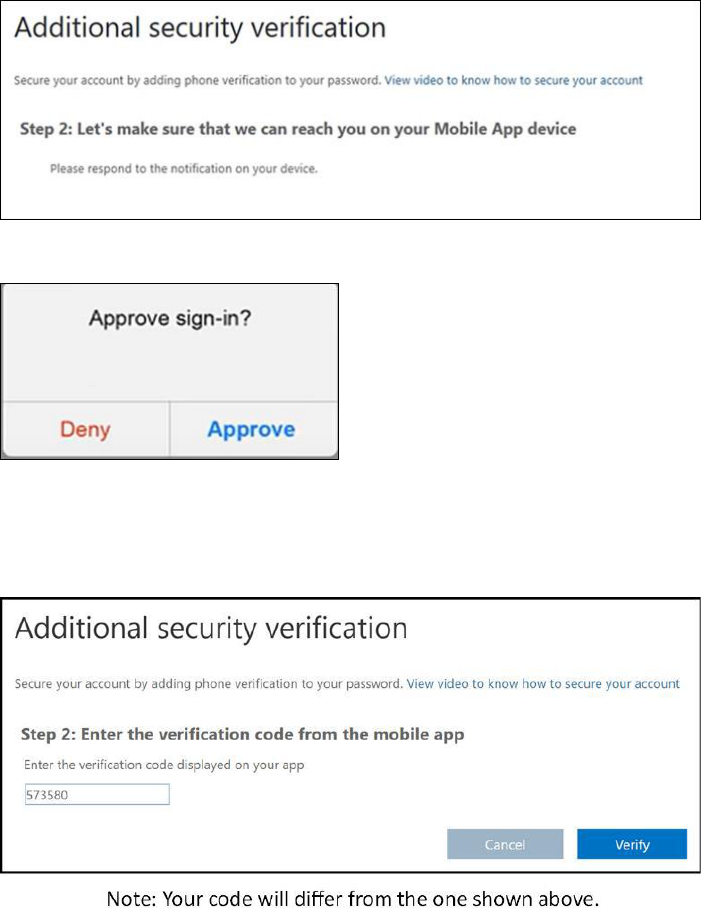
Step 2.
You will now receive a notification on the authenticator app.
If you chose “Receive notification for verification” in step 1, you will see the screen below for Step 2.
Click the Approve option within the authenticator app on your phone.
If you chose “Use verification code” in step 1, you will see the screen below. Enter the verification code
from the authenticator app into the box provided in Step 2 of the wizard. Click the Verify button.
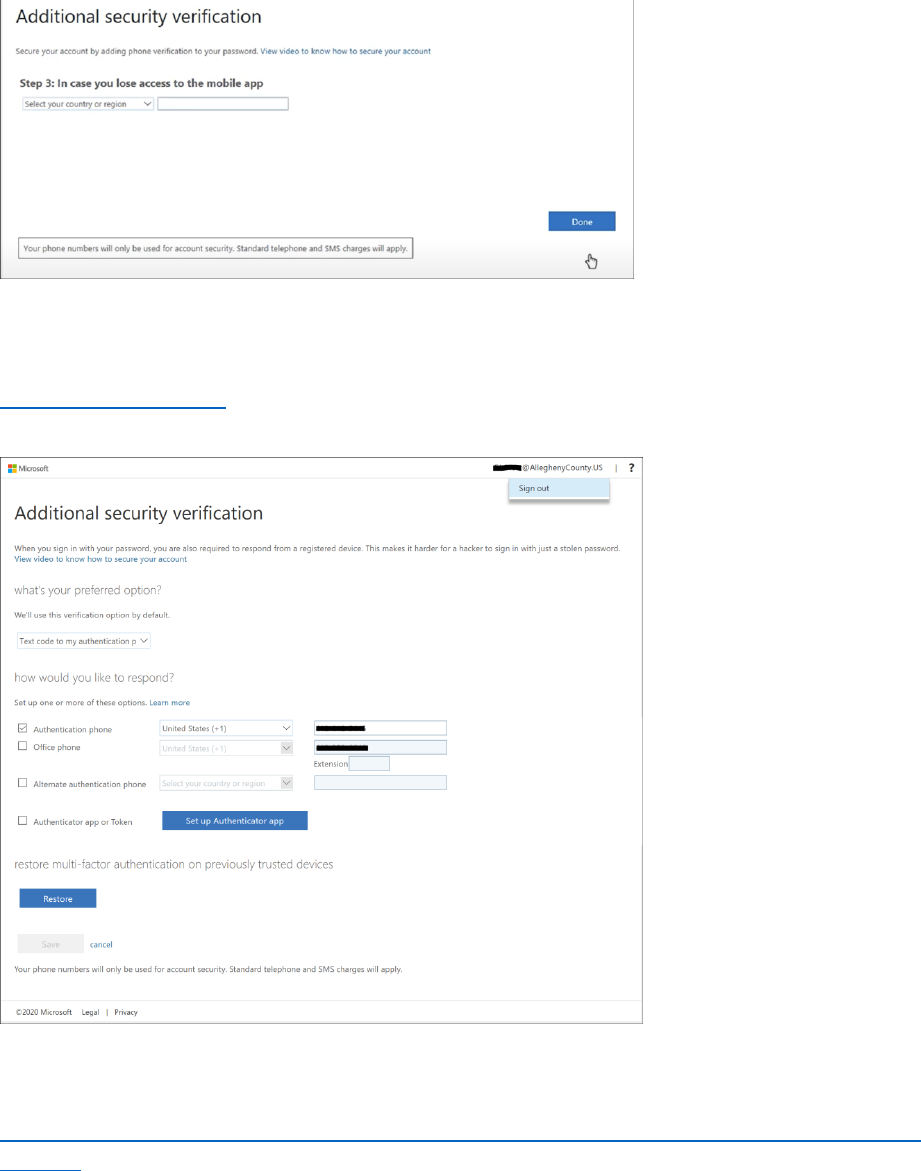
Step 3.
Setup an alternate notification method in case you lose access to the authenticator app. Select your
country code and enter your mobile phone number. The click the Done button.
Once you have clicked the Done button in Step 3, you will be taken to your MFA settings page. Here you
can add additional Multi-Factor authentication methods or change your default notification method. If
you need to make changes to your MFA settings, you can access this page by going to
https://aka.ms/mfasetup When you have completed your MFA enrollment, click on your user name in
the top right corner and select Sign Out.
For further instructions and help please see Microsoft’s documentation on setting up the authenticator
app.
https://docs.microsoft.com/en-us/azure/active-directory/user-help/multi-factor-authentication-setup-
auth-app

Multi-Factor Authentication via text message or
phone call to your smartphone
Go to https://aka.ms/mfasetup and sign in.
If you have not enrolled in MFA the “More information required” prompt will appear, click Next.
Step 1.
Select Authentication phone from the drop-down menu. Select your country code and enter your
mobile phone number. Click Next button.
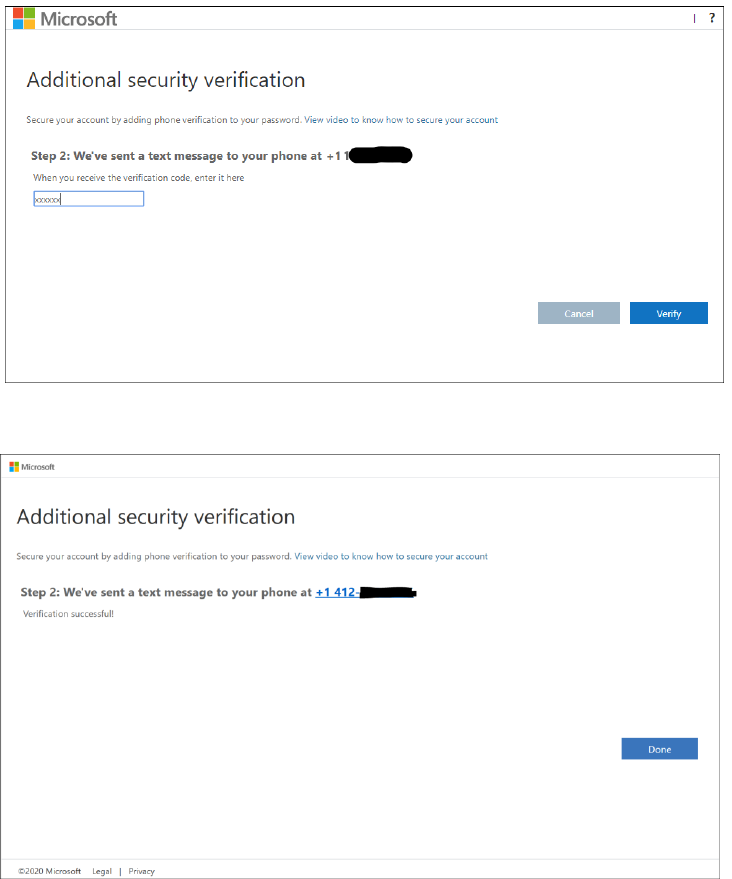
Step 2.
If you selected “Send me a code by text message” in Step 1, you will now receive a verification code on
your phone, enter it into the field provided. Click Verify button.
Click Done after successful verification.
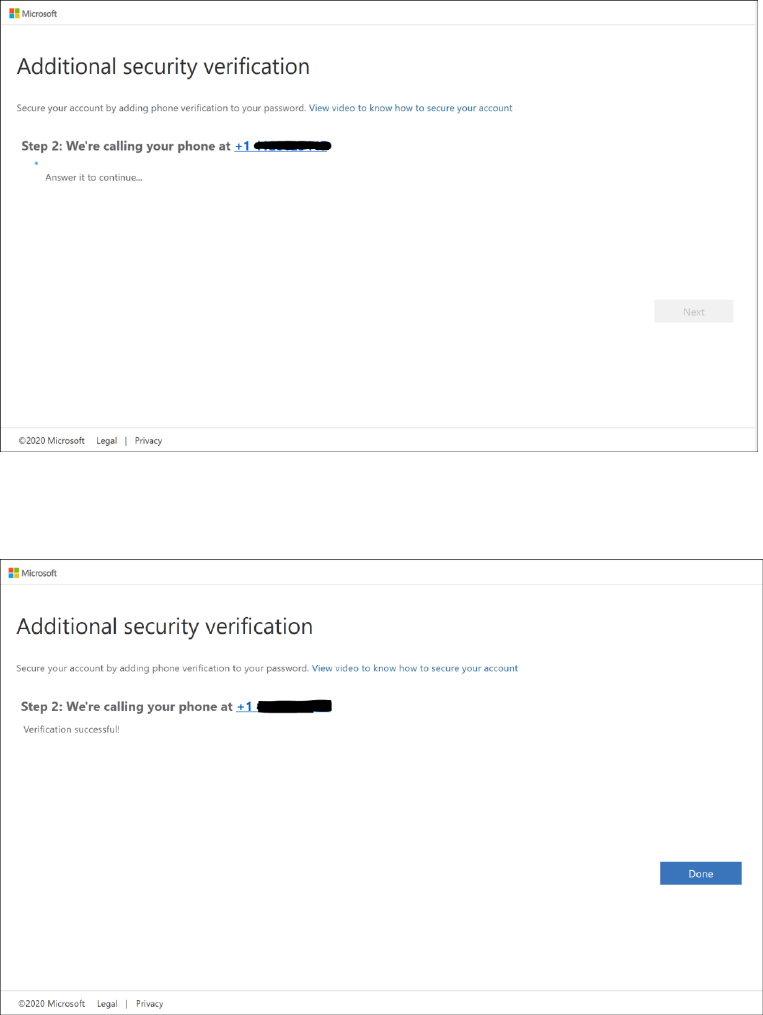
If you selected “Call me” in step 1, you will receive a phone call, enter the # key to verify the sign-in
request.
Click Done after successful verification.
Once you have clicked the Done button in Step 2, you will be taken to your MFA settings page. Here you
can add additional Multi-Factor authentication methods or change your default notification method. If
you need to make changes to your MFA settings, you can access this page by going to
https://aka.ms/mfasetup When you have completed your MFA enrollment, click on your user name in
the top right corner and select Sign Out.
For further instructions and help, please see Microsoft’s documentation on setting up your mobile
phone for MFA verification.
https://docs.microsoft.com/en-us/azure/active-directory/user-help/multi-factor-authentication-setup-
phone-number
Multi-Factor Authentication via phone call to
your office phone
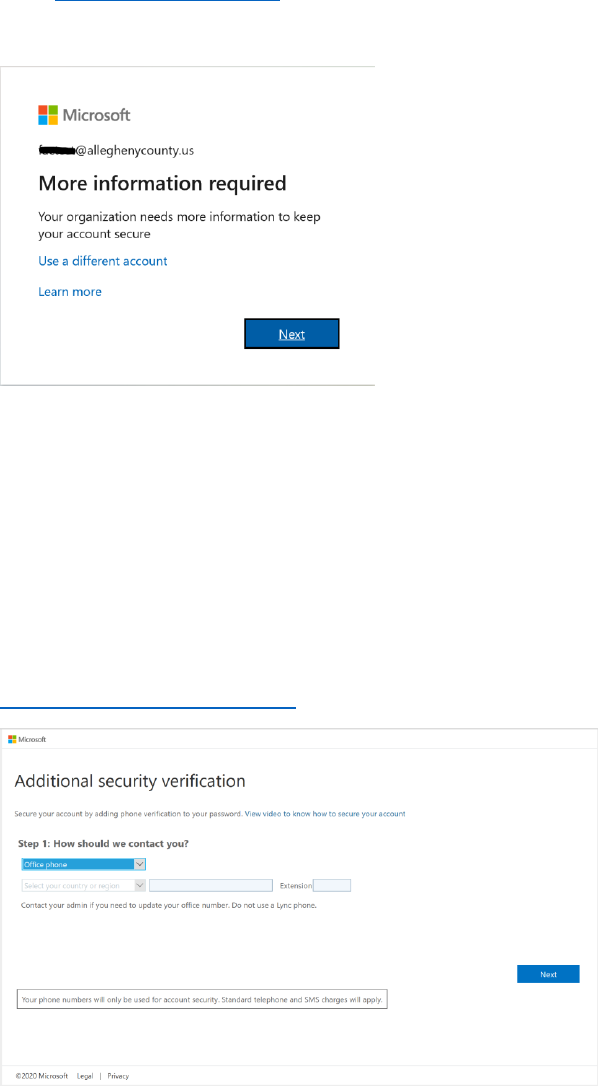
Go to https://aka.ms/mfasetup and sign in.
If you have not enrolled in MFA the “More information required” prompt will appear, click Next.
Step 1.
Select Office phone. Make sure the county code and correct office phone number are populated. Click
the Next button.
(Note: If your office phone number is not already set in Active Directory, the phone number field will be
blank, and you will not be able to use this method of verification. Please contact the service desk to
have your office phone number information update, then try again. If the phone number shown is
incorrect, also contact the service desk to have your phone number information updated.
servicedesk@alleghenycounty.us or 412-350-4357)
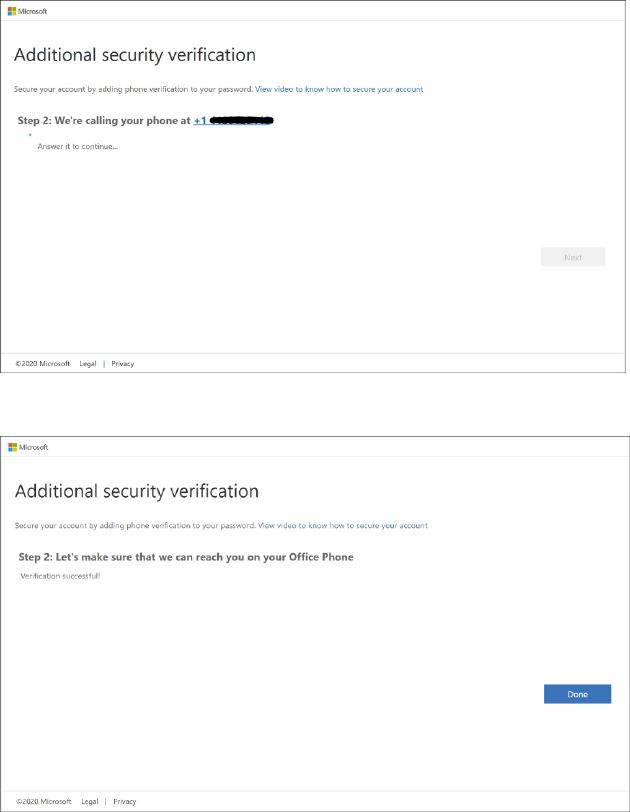
Step 2.
You will now receive a phone call to your office phone, enter the # key to verify the sign-in request.
Click Done after successful verification.
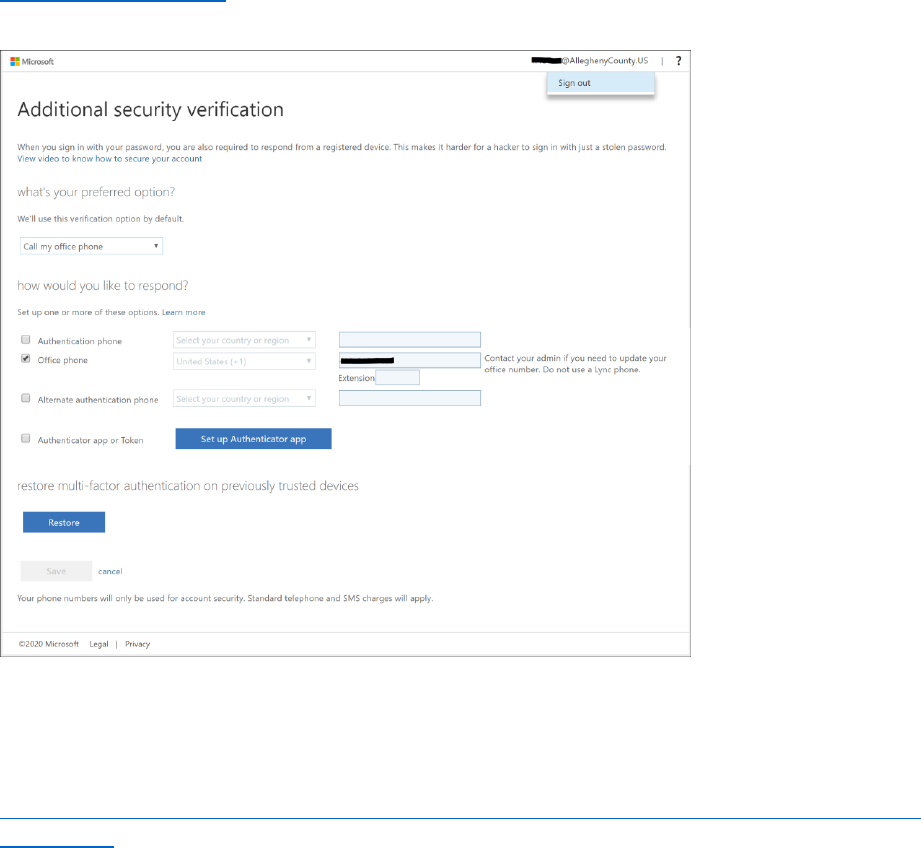
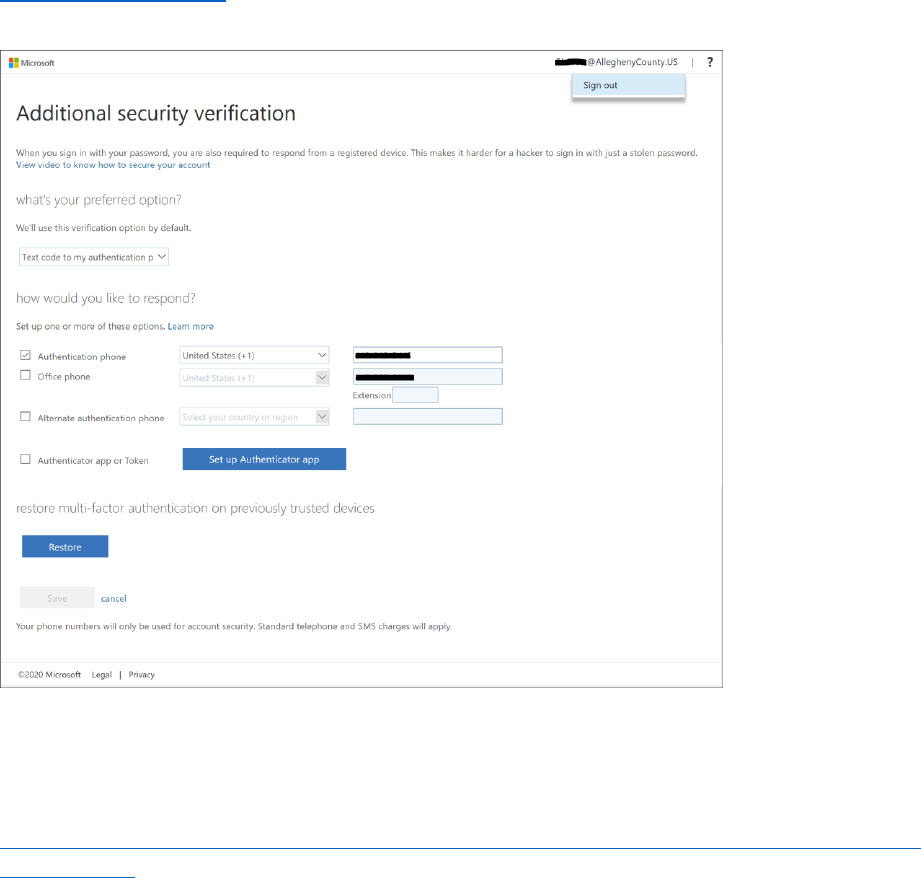
Once you have clicked the Done button in Step 2, you will be taken to your MFA settings page. Here you
can add additional Multi-Factor authentication methods or change your default notification method. If
you need to make changes to your MFA settings, you can access this page by going to
https://aka.ms/mfasetup When you have completed your MFA enrollment, click on your user name in
the top right corner and select Sign Out.
For further instructions and help, please see Microsoft’s documentation on setting up your office phone
for MFA verification.
https://docs.microsoft.com/en-us/azure/active-directory/user-help/multi-factor-authentication-setup-
office-phone
