Pom Pom Pals
©2021 • Textile Center • All Rights Reserved
For more information please go to youthfiberart.org
*Materials in kit may differ from ones pictured.
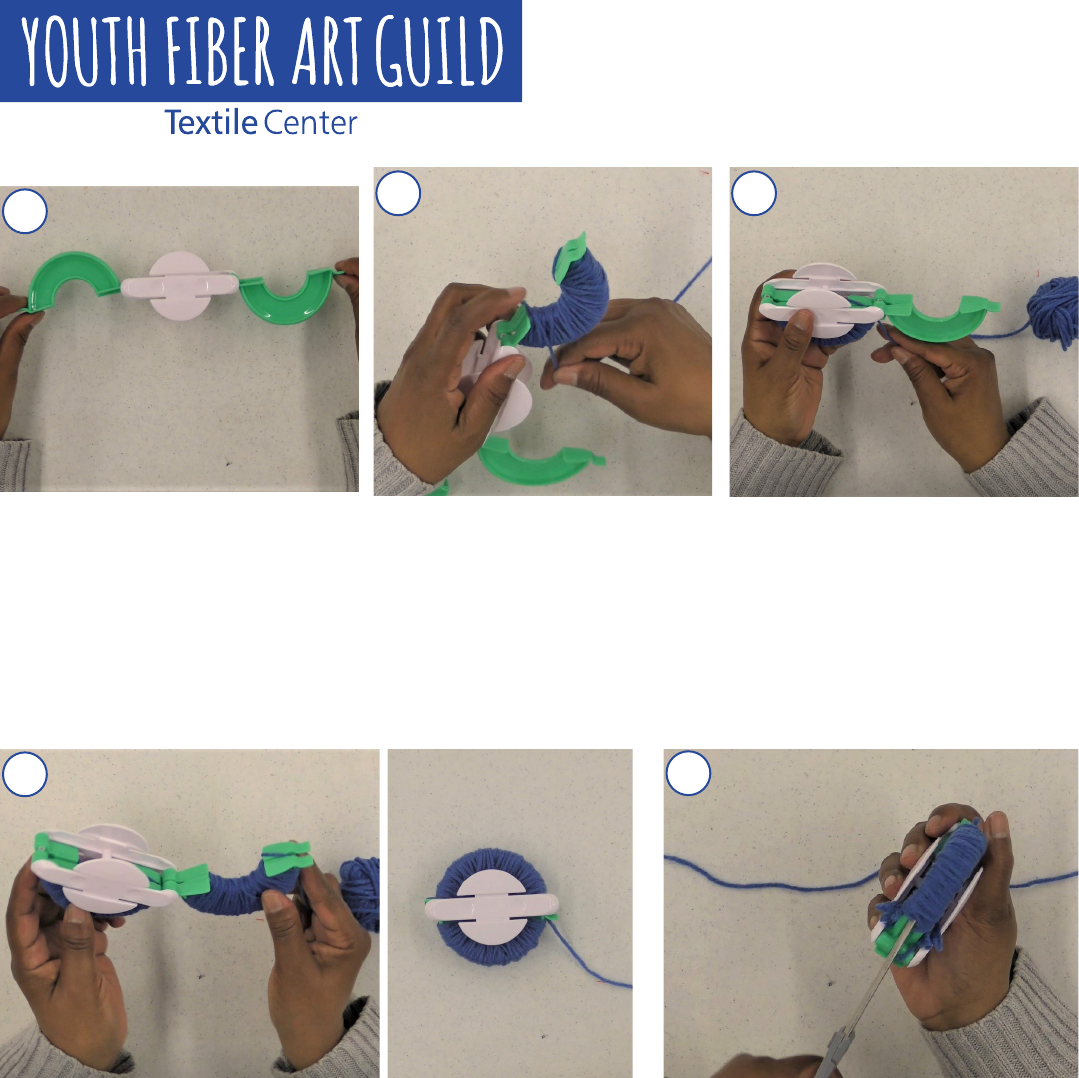
Open your pom-pom maker so
there are two curved parts or arms
on either side of the center piece.
Choose a large ball of yarn from your
kit that will form this pom-pom.
11
Wrap the yarn around each curved
arm of the pom-pom maker. Wind
enough yarn so that you can’t see
the base color of your pom-pom
maker through the yarn.
22
Wrap the yarn around the second curved side of the pom-pom
maker, using the same continuous piece of yarn from the other
side. Make sure to wrap the yarn so you don’t see the pom-pom
maker beneath your yarn. When you are done, wrap the yarn so
the loose end is again on the outside end of your pom-pom maker,
then close that curved arm.
44
Once the arm is covered in a thick
layer, wrap your yarn so you are on
the outside end of this curved piece
and close that part of the pom-pom
maker, so it meets up with the center
white piece. Your loose end of yarn
should now be close to the curved
piece on the other side.
33
55
Cut the yarn connected to the pom-pom
maker, and then measure about an arm’s
length of yarn, cut, and set aside. Pick up
your pom-pom maker and a pair of scissors.
Making sure to hold the pom-pom maker
tightly in one hand, take your scissors and
start cutting the yarn down the center gap
of the tool. Continue cutting the yarn all
around the outside edge of your pom-pom
maker.
Pom Pom Pals
©2021 • Textile Center • All Rights Reserved
For more information please go to youthfiberart.org
*Materials in kit may differ from ones pictured.
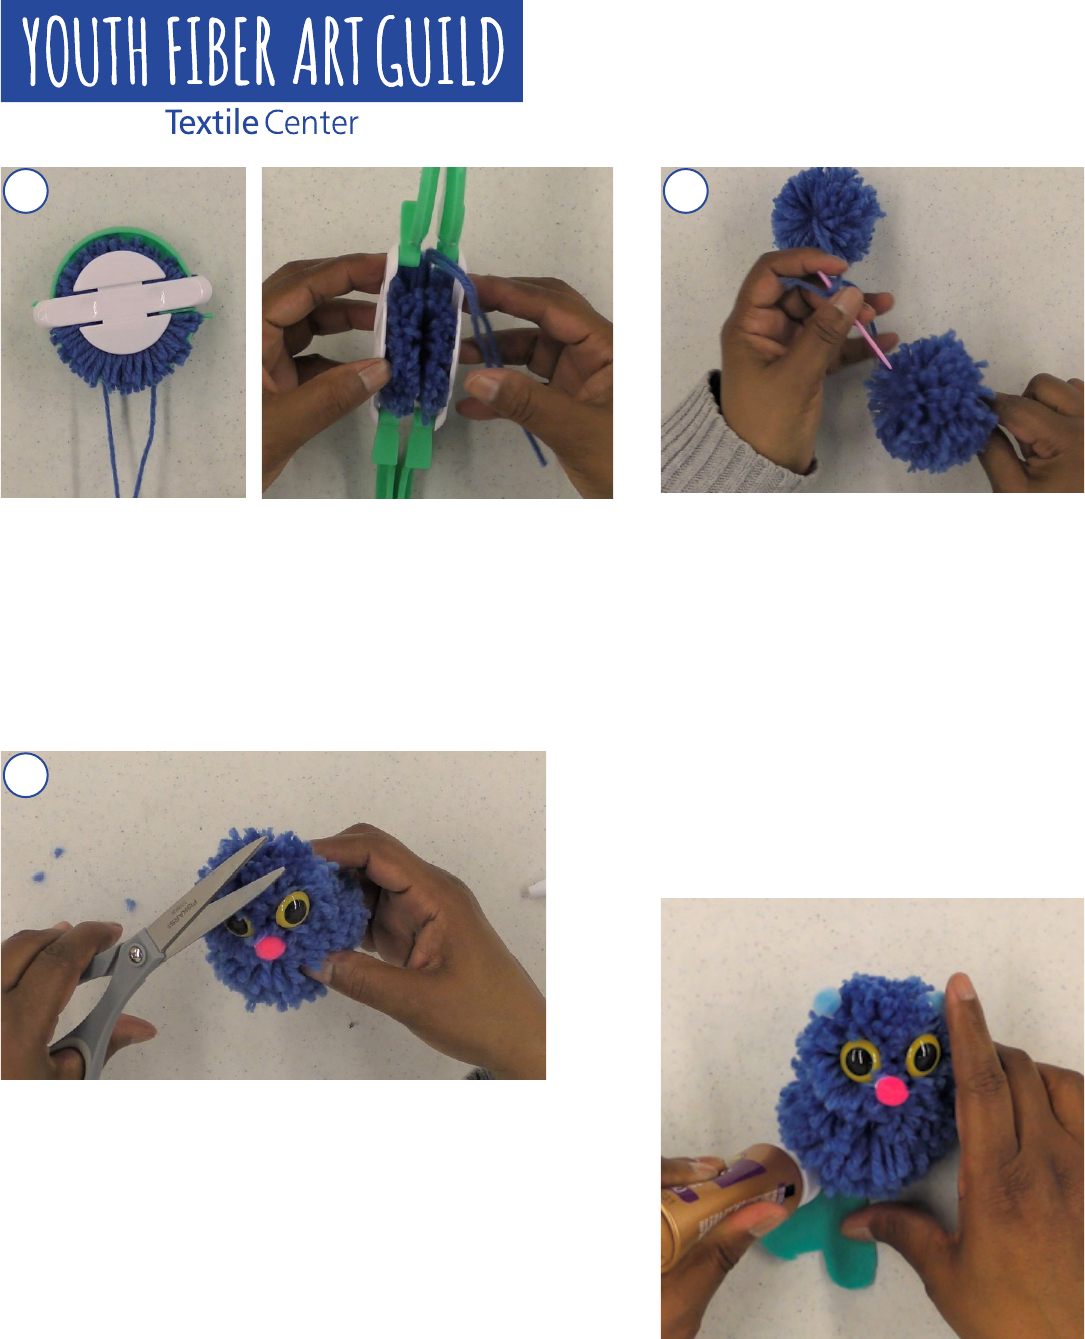
Pick up that portion of yarn you cut earlier and wrap it around the
pom-pom maker in that same groove you just used when cutting
the yarn. Pull it tight, and make a really tight knot – this is the
knot that will hold your pom-pom together. Make a second knot,
then you can open up your pom-pom maker. Start with the curved
arms, and then pull the center pieces away from each other. Now
you have a pom-pom! Roll it in your hands to fluff up the pieces of
yarn. If you want, you can give it a hair cut with your scissors.
66
Make another pom-pom, using the other
size pom-pom maker that came in your kit.
This can be with the same color yarn or a
different color – whatever you want your
Pom Pom Pal to look like! Then, thread one
of the longer pieces of yarn used to tie your
smaller pom-pom together into your needle.
Push the needle in to the center of the larger
pom-pom, and pull the yarn through. Re-
peat this process with the other tail of yarn,
bringing it through in the same place. Grab
all four tails of yarn and tie them in a knot –
this will hold the two pom-poms together.
77
88
Give your Pom Pom Pal some decorations that bring it
to life! Using your craft eyes, glue, and felt, attach eyes,
nose, ears, wings, feet, and whatever else your Pom Pom
Pal needs. A helpful hint – if you are making two wings
or two feet, fold your piece of felt in half before drawing
and cutting, so you get two shapes that are exactly the
same. If you notice that your Pal needs a haircut, carefully
use your scissors to shape your new friend.
